This is part of our series where we will dig up the best mods for every class in Baldur’s Gate 3, including the official in-game BG3 mod page, Nexus Mods, and the occasional Patreon when a mod author decides to publish an awesome set there. I’m very deep into roleplaying. That means every companion gets dressed properly and no one is allowed to run around Faerûn wearing something that doesn’t fit their class fantasy.
Because of this, I’ve spent an ungodly number of hours digging through the best BG3 armor mods for rangers and every other class I play, or assign to my companions. Whether you’re roleplaying a classic bow-focused ranger, a dual-wielding tracker, or something heavier and more cursed, there’s something here for you.
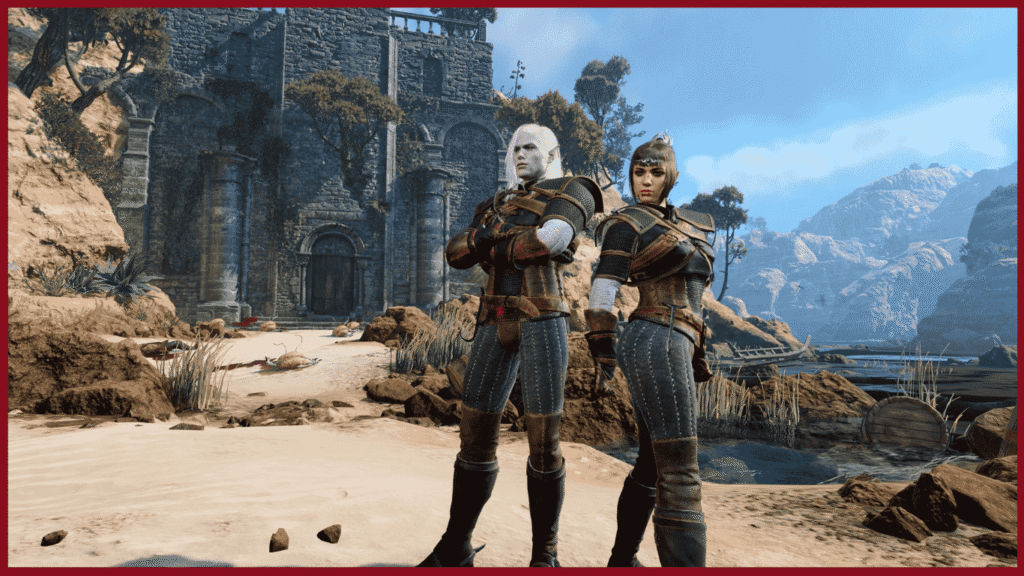
1. Witcher 3 ranger armor mods
We are gonna start right away with 3 mods from one of my favorite games… Witcher 3. You get three sets from the game: Viper (Geralt’s canon set), Manticore, and Bear. Witchers are basically 90% Rangers, and now you can look like them while playing your favorite class.
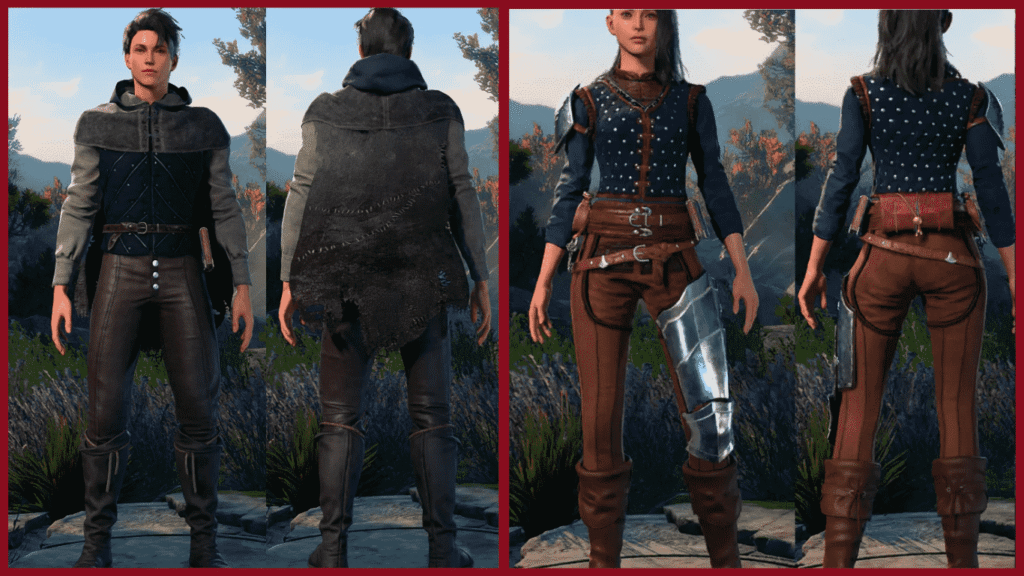
This is the starting set from a new Monster Hunter game. Even though it’s a starter armor, it’s my favorite set from that game, and it fits the Ranger class perfectly with its dark green colors, and a hoodie.l set:
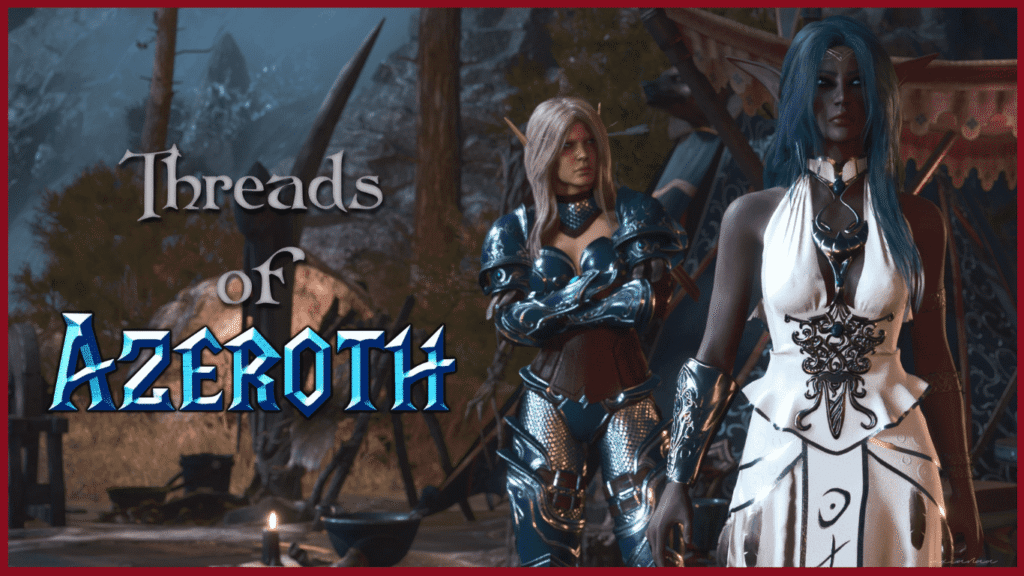
We move to the biggest MMO of all time, World of Warcraft, with Sylvanas’s armor when she was a high elf RANGER! (get it?) In Quel Thalas. Looks awesome, fits high elves perfectly.
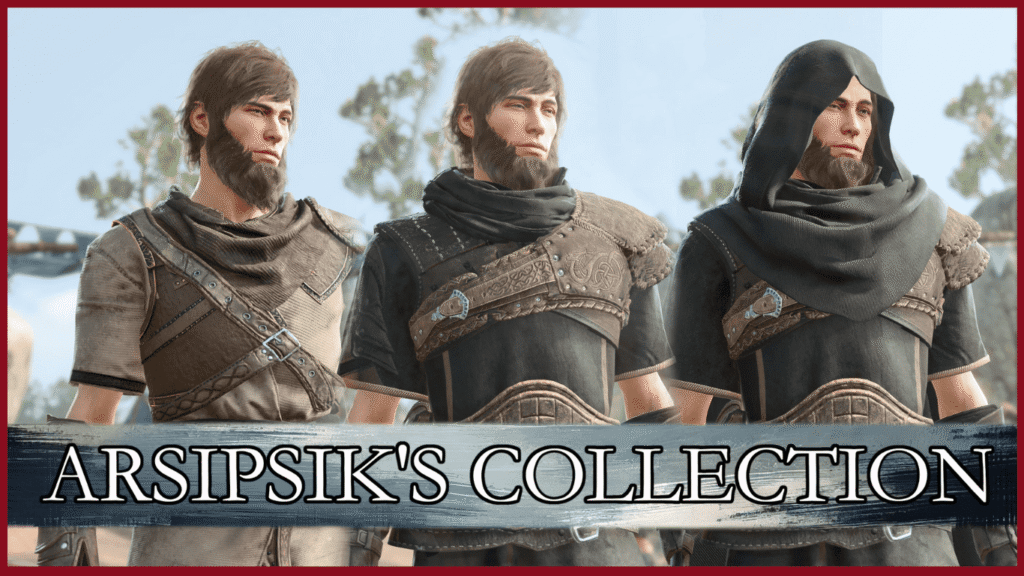
This armor is a combination of vanilla armors, put together into a wonderful new set. There are too many sets here for us to try to explain them all, so hop on the mod page and see if there is anything you like.
There are several armor pieces in this mod that could work on a lot of different classes, like barbarians (since the chest piece is taken from God of War).
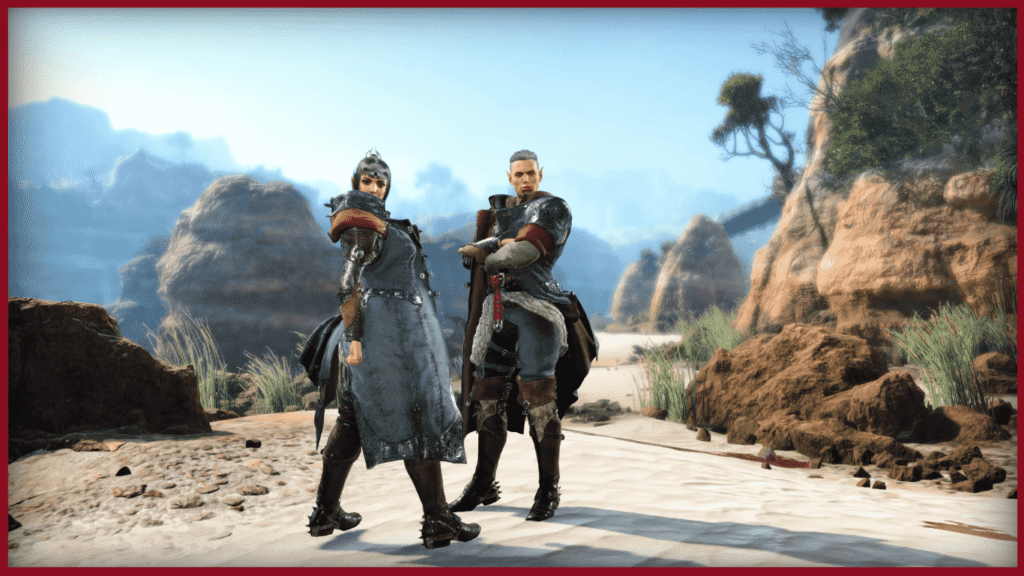
However, these armors are rugged enough to fit your ranger as well, especially the hood with a cape. Different armors from this mod work on different body types, but all of them work on body type 2.
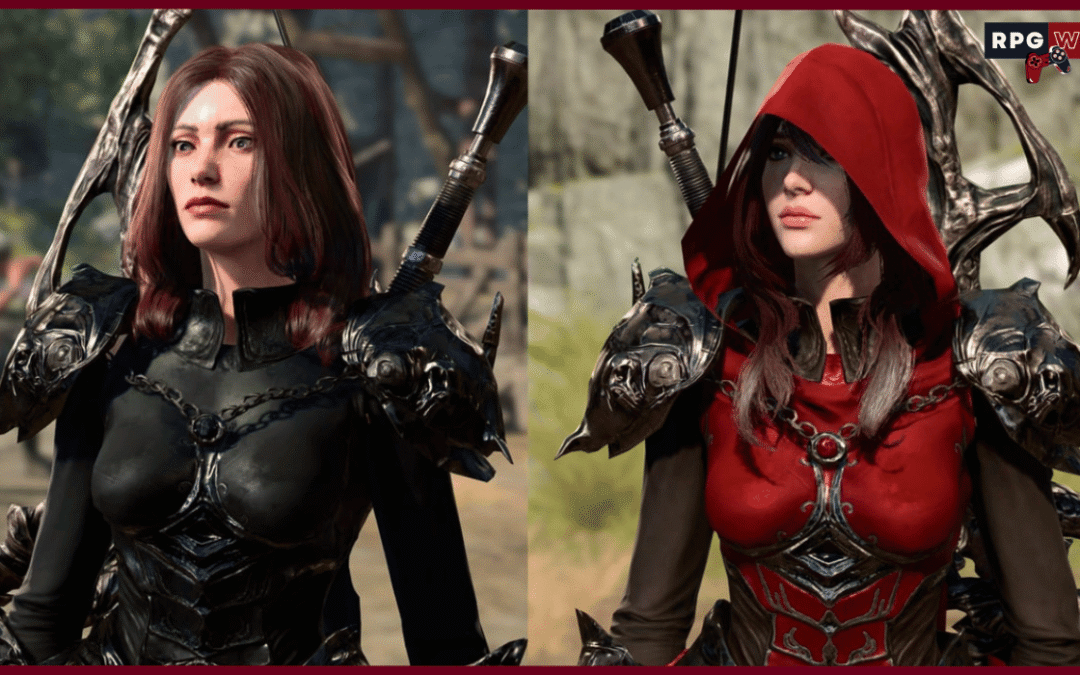
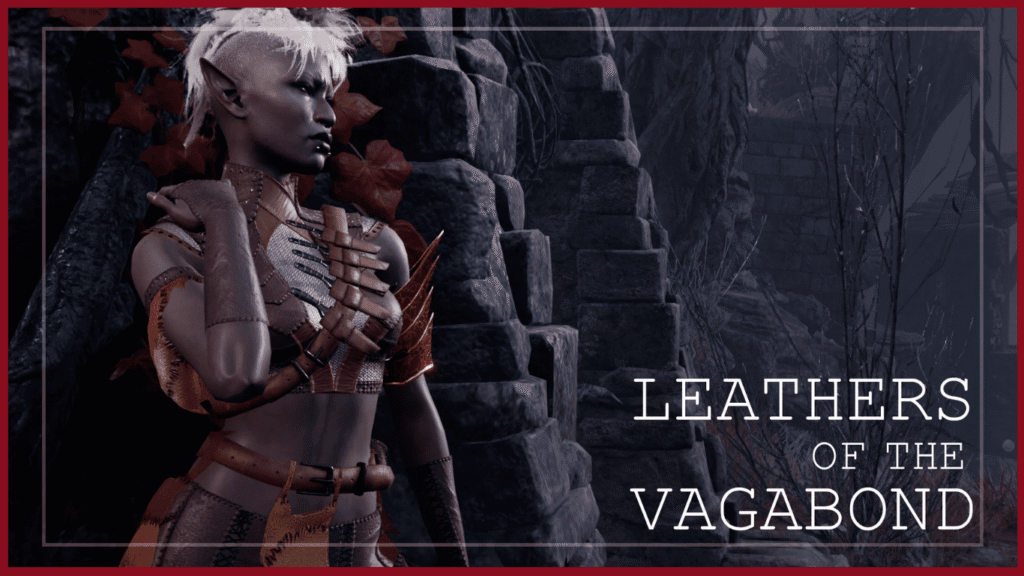
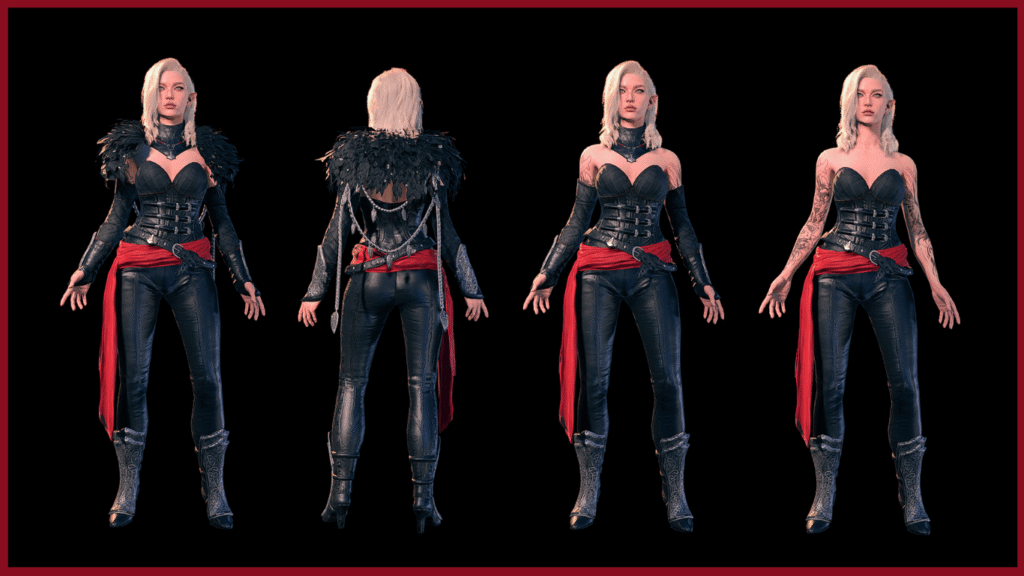
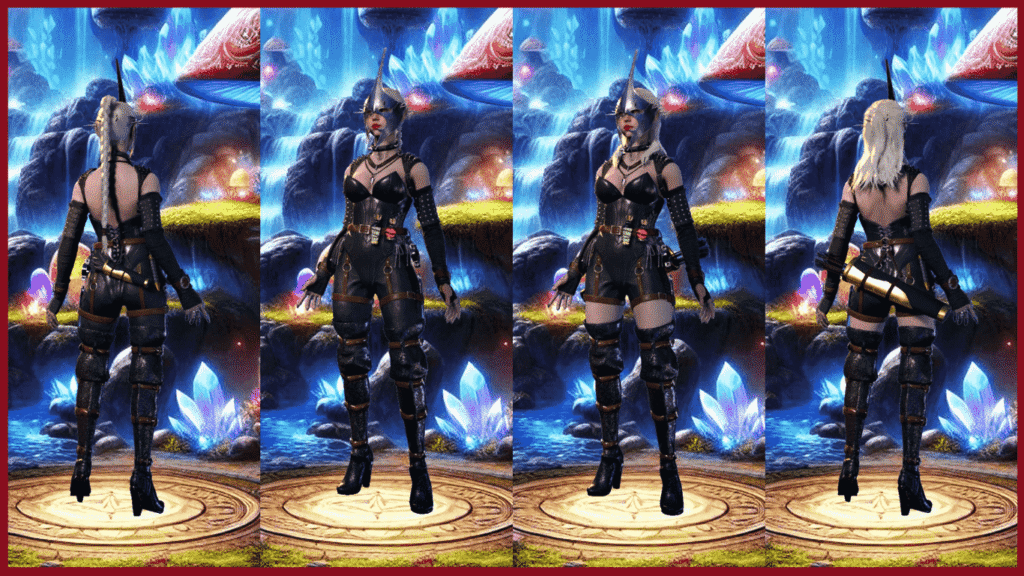
For all the female rangers who want to feel sexy, this leather armor set with throwing knives hanging on every belt is perfect. It especially fits elves and drows because it just has that vice to it.
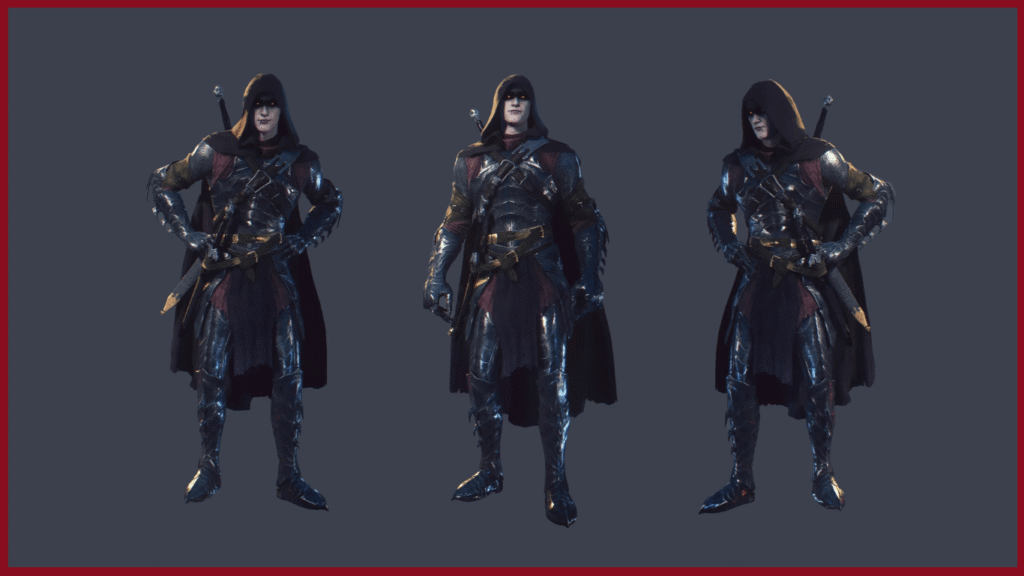
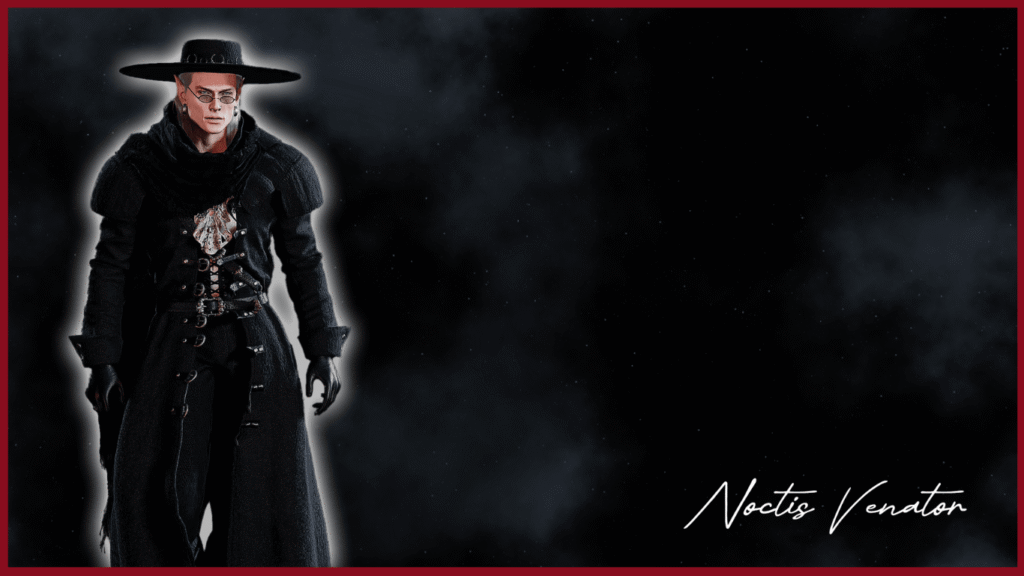
Now, this armor is one of my favorites because it basically makes you look like a medieval Batman. The hood also makes your eyes glow red, which is a nice touch. All and all, an amazing armor mod for rangers that doesn’t leave my mod list.
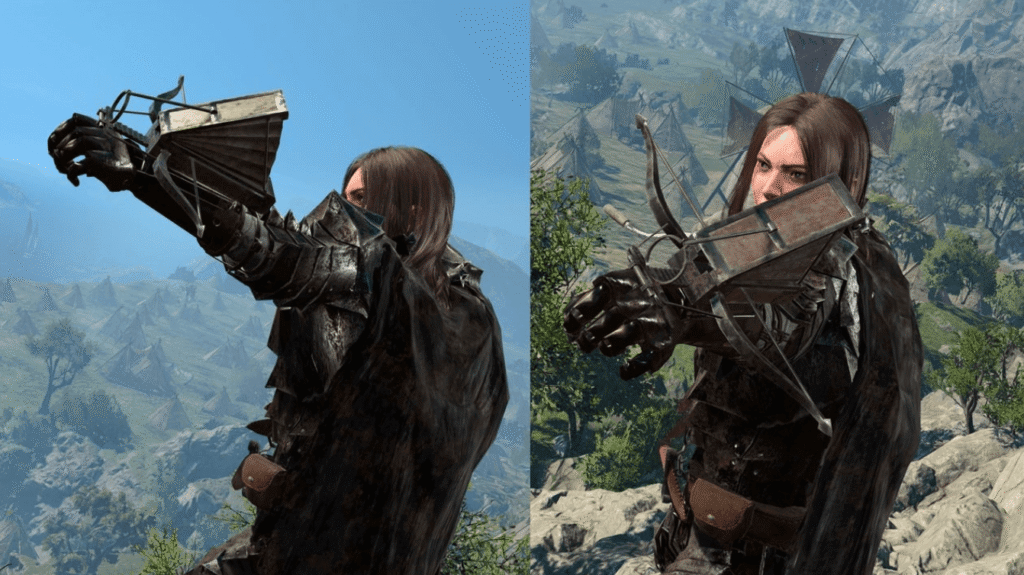
I know Guts is mostly a fighter, but later into his black swordsman era he kinda’ multi-classes into a ranger, don’t you think? True to lore, this set has throwing knives and a hand crossbow. So if you want to RP a heavy armored melee ranger, download this BG3 armor mod, you won’t regret it. Ready to hunt demons?
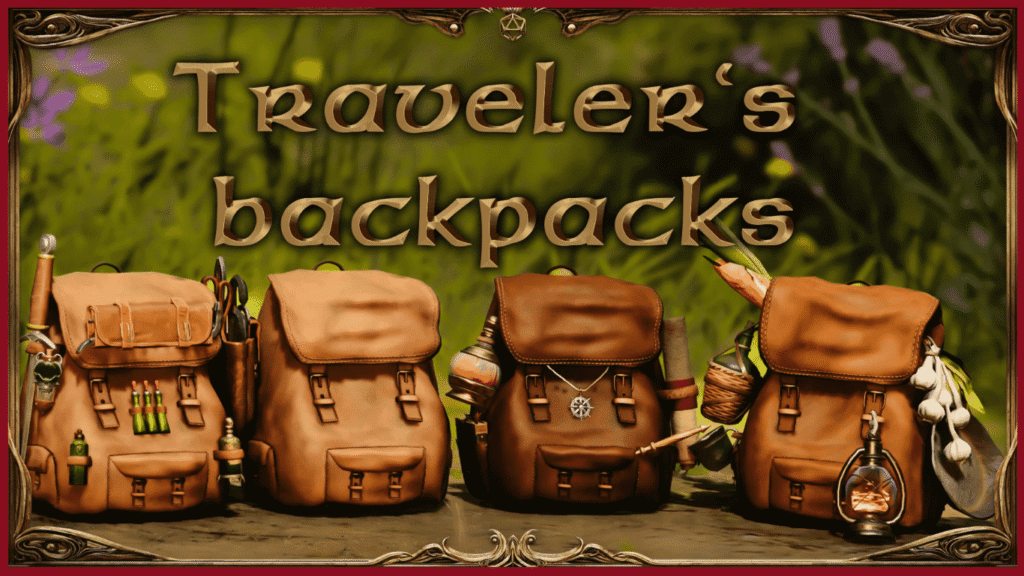
The last thing every ranger needs when heading into the wild is a proper backpack. This BG3 armor mod lets you layer backpacks using the cloak slot, and these are the best-looking ones in my humble opinion. The version with the knife and all the tools feels especially right for a ranger.
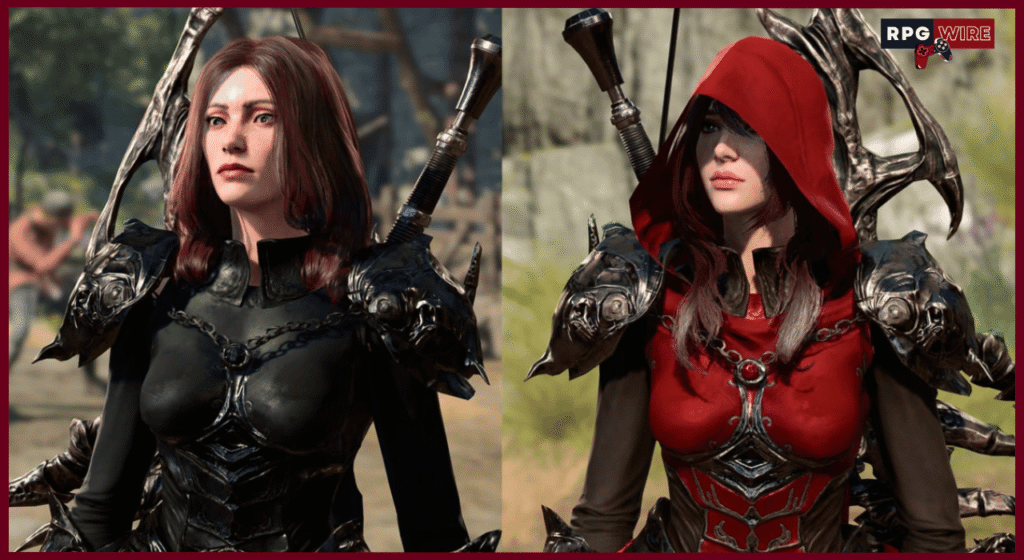
This last one is a full set of armor, weapons, and camp clothing for Death Archers. This is a perfect ranger armor set that is fully dyeable (and it dyes beautifully since we’re on the topic).
Final thoughts…
Rangers in Baldur’s Gate 3 are in a weirdly great spot when it comes to armor mods. You can lean fully into the classic fantasy tracker look, borrow from other franchises like The Witcher or Bloodborne, or push into heavier, almost fighter-style territory if that’s your thing.
I’ll keep updating this list as new BG3 ranger armor mods show up, so if you’ve found a set that deserves a spot here, chances are we want to see it too. Happy hunting. Also, check out my recommendations for barbarian, and rogue mods, while you’re at it.
Rogues in Baldur’s Gate 3 live and die by presentation. If you’re going to stab someone in the back, you might as well look good doing it. This article is part of our ongoing series where we dig up the best mods for every BG3 class, pulled from the in-game mod page, Nexus Mods, and the occasional Patreon rabbit hole.
I’ve spent an unreasonable amount of time testing BG3 rogue armor mods that actually fit how rogues play and feel in-game. These are rogue armor mods BG3 players can roleplay with, whether you’re running a classic thief, a pirate, a swashbuckler, or just dressing Astarion better than the game ever intended.
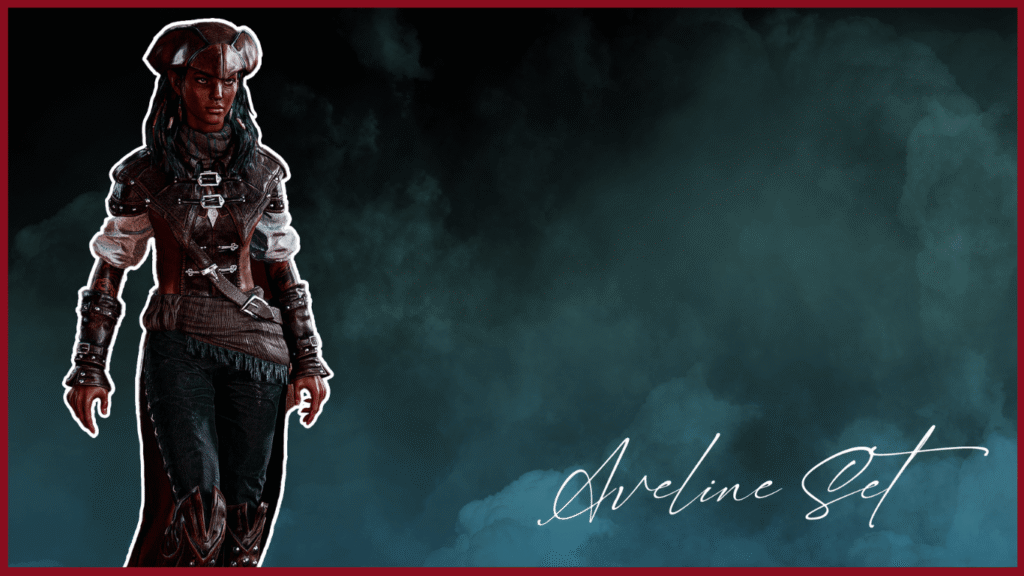
Right off the bat, we start with the Aveline set from Assassin’s Creed. If you want to roleplay as a female assassin or a pirate, this set would fit you perfectly.
This set is literally called the Rogue set, so if it doesn’t belong on this list of BG3 rogue armor mods, I don’t know what else does. The look on the leather is really high quality, and the fur cape alone is enough to download this and put it on your list. Worth noting are also the facts that the pieces work very well with other armor mods, and that the mod also comes with its special “rogue” leather armor dyes.
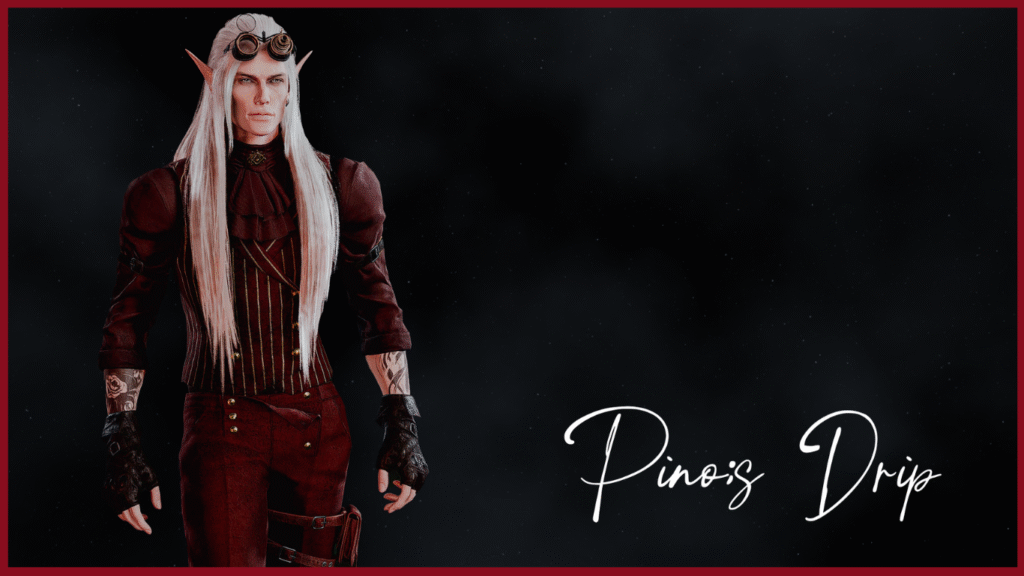
This is one of those mods with too many armor sets to count. All of them have that Renaissance drip aesthetic, with goggles and top hats and cool suits.
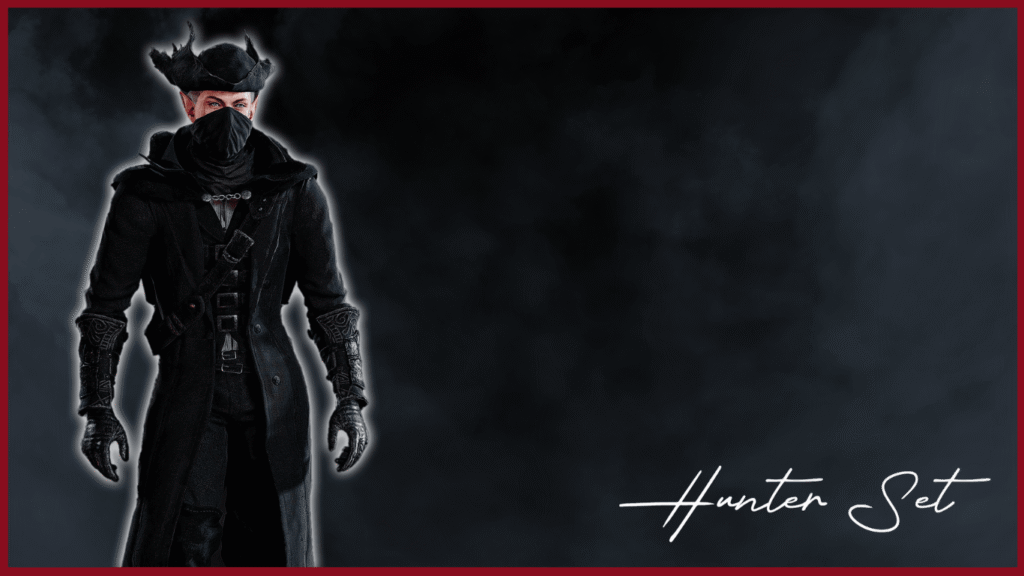
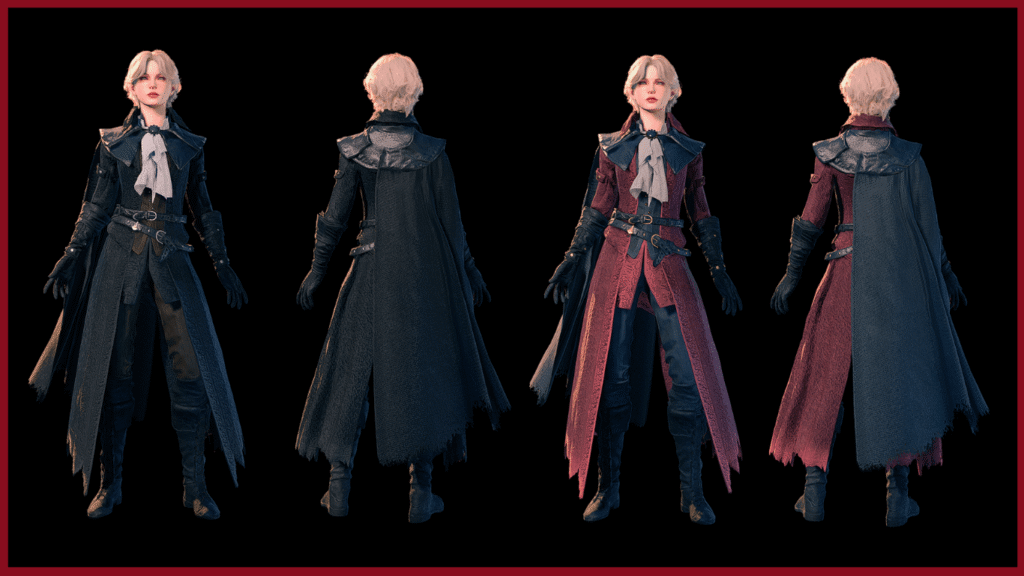
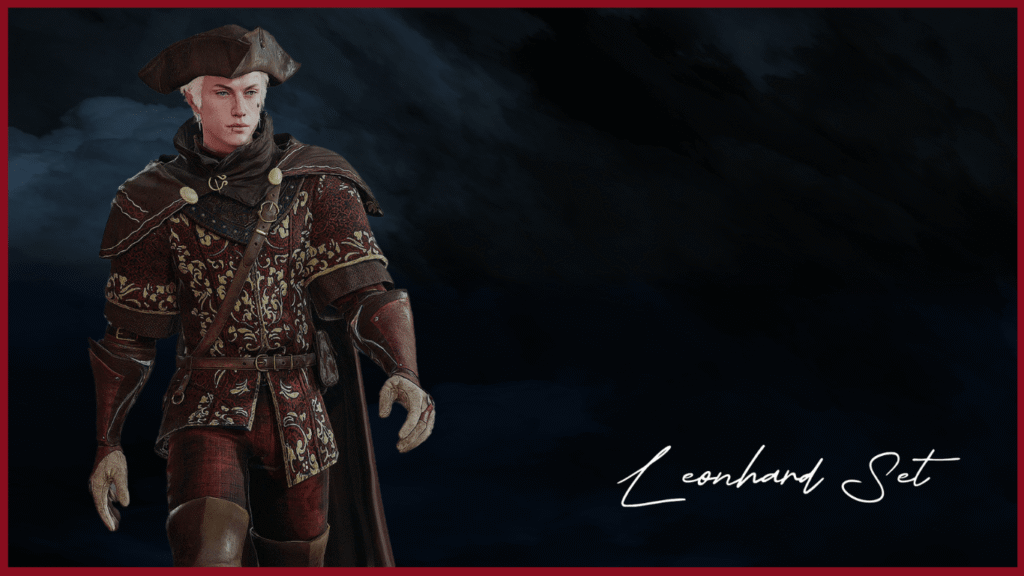
My female buddy likes to dress up Astarion in this outfit every playthrough and goon over him. I don’t know about Astarion’s part, but I am gooning over this outfit myself. It’s incredibly high quality and looks like an armor a Bloodborne hunter would wear after he killed every single monster in the nightmare.
This set looks like something a pirate captain would wear after he looted 100 other ships, made millions off gold, and is ready to retire. And now you can too.
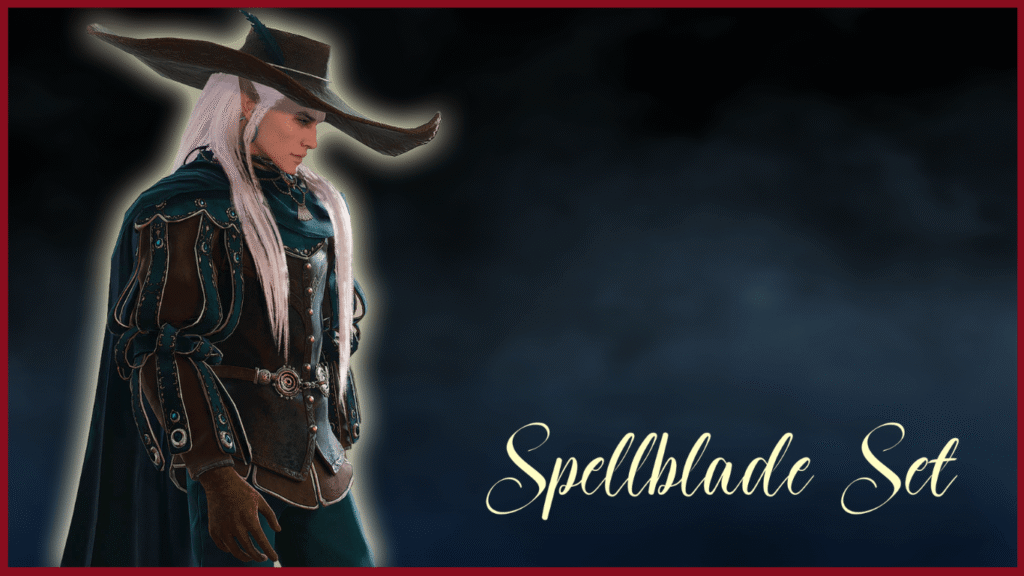
Even though this armor would fit great for bards, warlocks, or wizards, I think it also fits perfectly for you, arcane tricksters. With a huge hat and embellished sleeves, it’s a perfect fit for spell-flinging rogues.
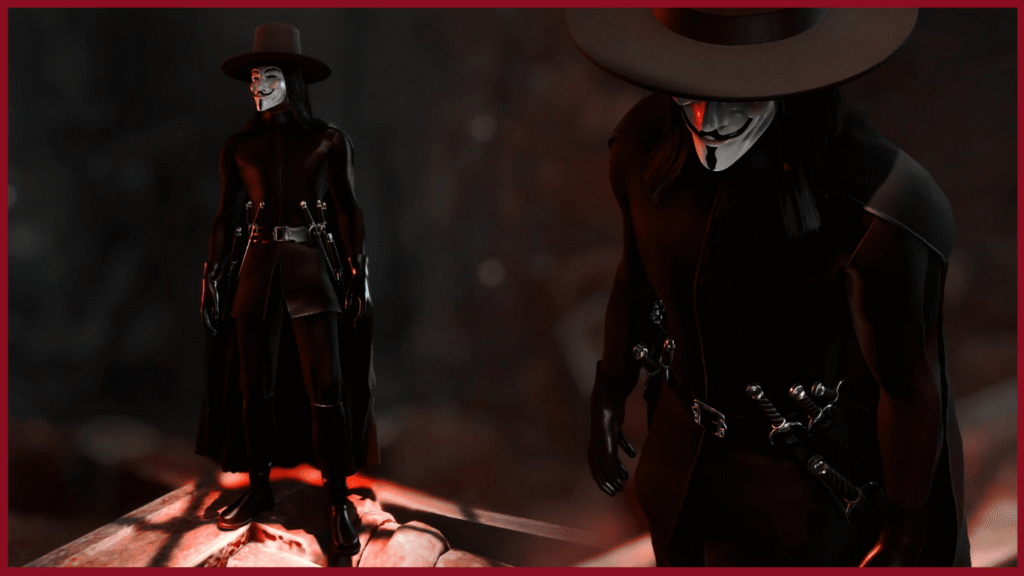
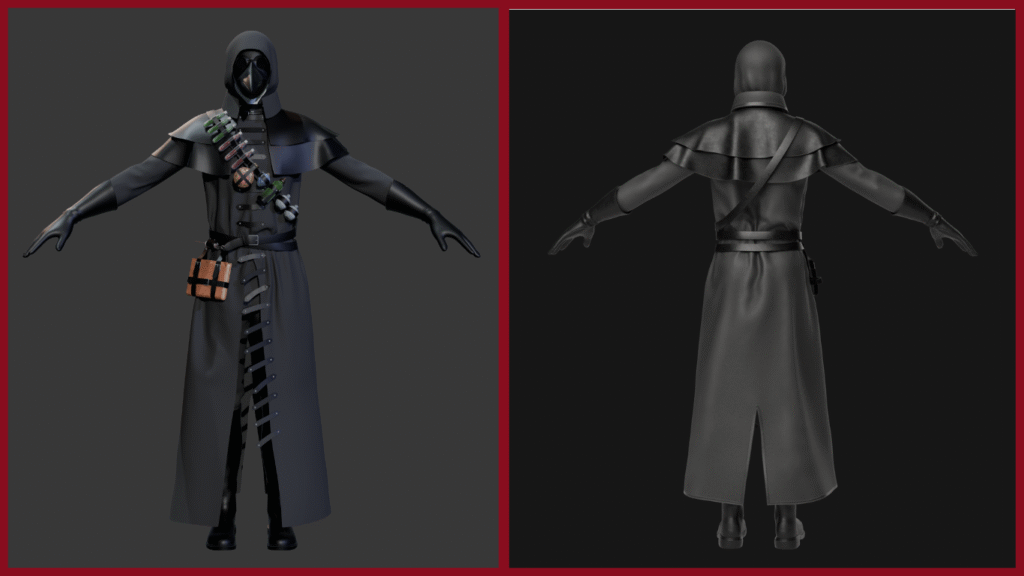
Everyone knows V, and if you don’t, stop reading and go watch the movie right now. This armor is a perfect replica of the clothes V wears, including his mask, hat and daggers on the hips.
This set is a liberal interpretation of Plague doctor outfits from the medieval period. I especially like the shoulder belt with all the potions and vials. You can roleplay being a rogue alchemist who uses poisons on his weapons.
One more of those who have more sets in a single mod than this whole article. It’s a black, cloaked version of an armor set that Minsc wears, and it fits perfectly for your rogue character. It also comes with variants for camp attire.
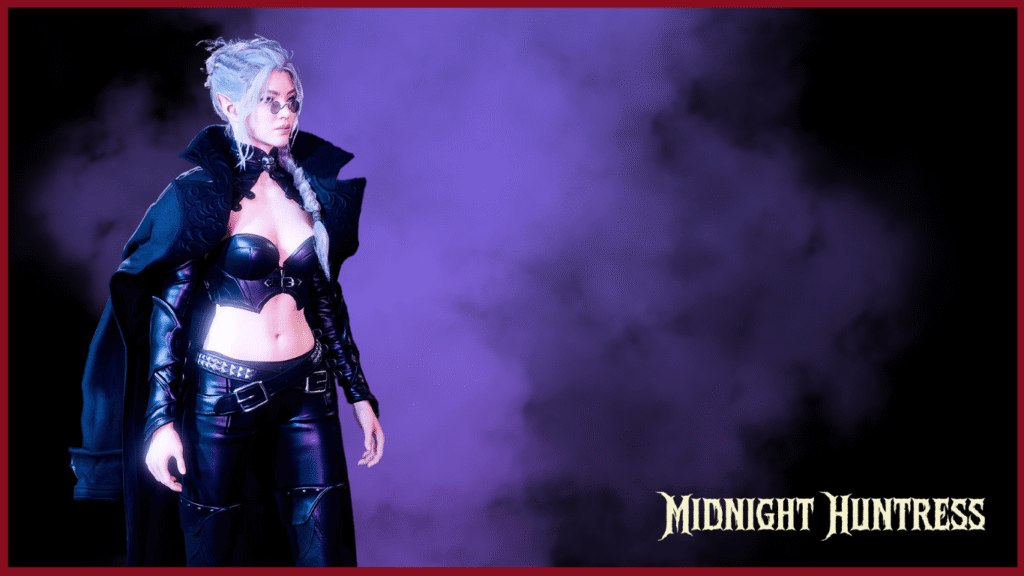
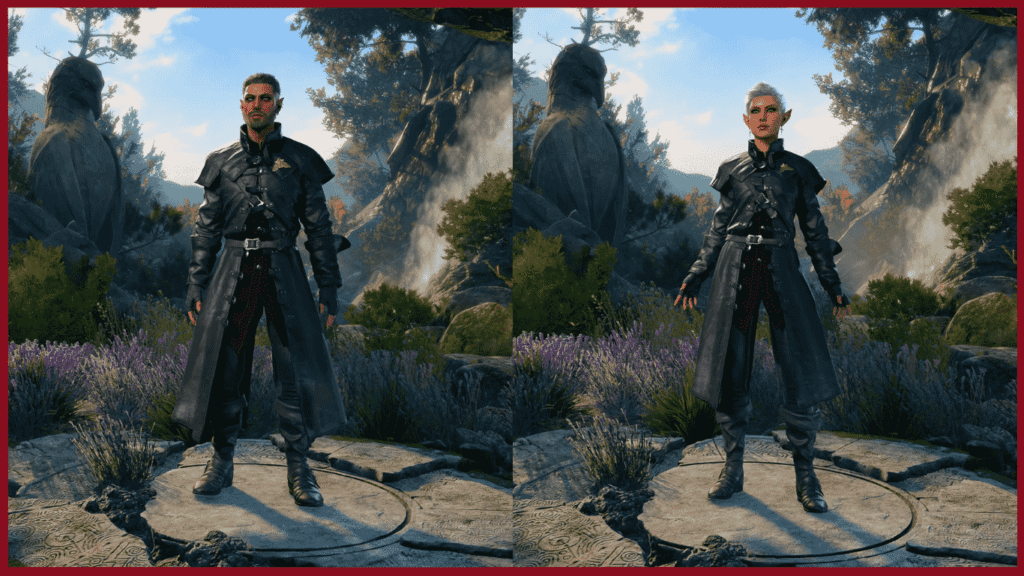
This mod adds a full drow fencer-style set with custom models and textures, and it looks exactly like something a high-end Underdark assassin would wear. The pieces are dyeable, come with customization options, and are acquired in more immersive ways.
It works best on female body type 1 (elf, half-elf, drow, human, tiefling), with a few items available for male body type 2.
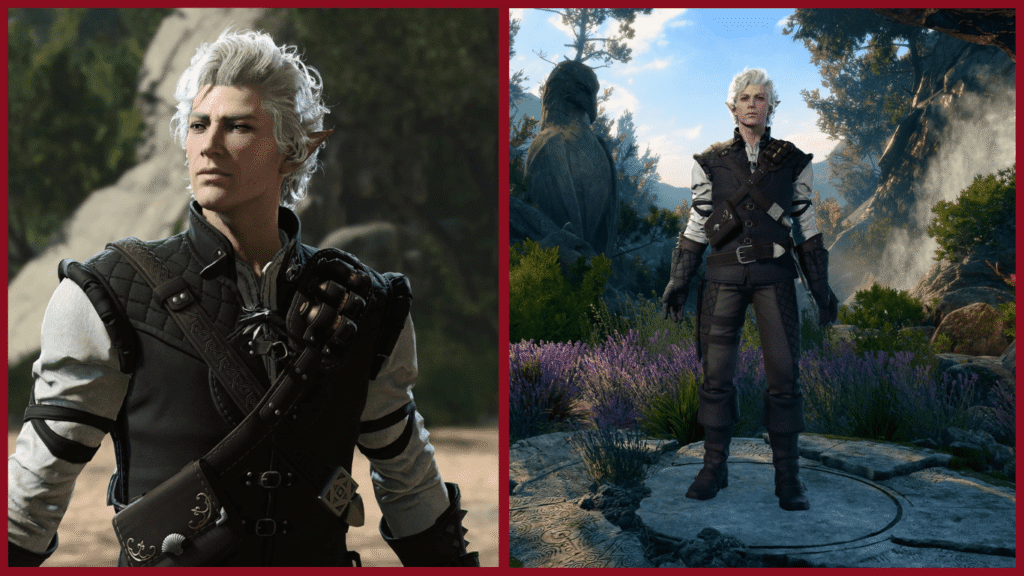
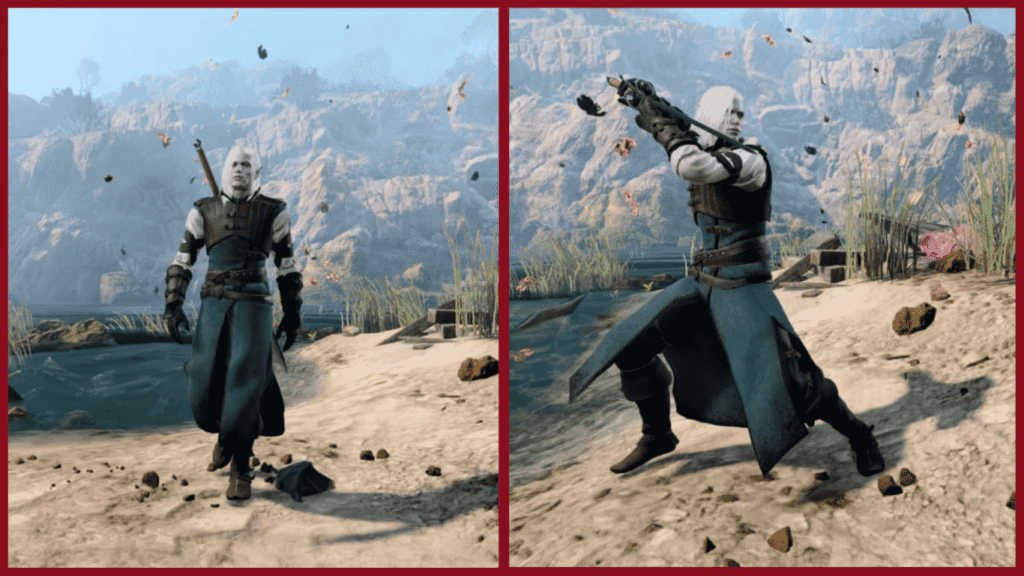
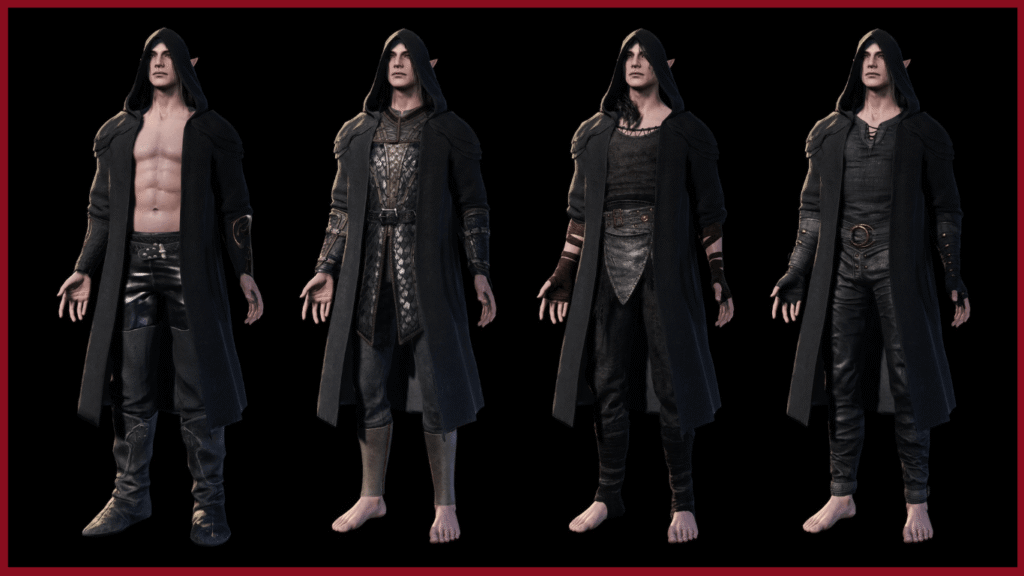
This is Dettlaff’s armor set from The Witcher, plain and simple. Dark, dramatic, and very on-brand for a rogue that leans more assassin than street thief. The mod adds four outfits, along with fingerless gloves and boots.
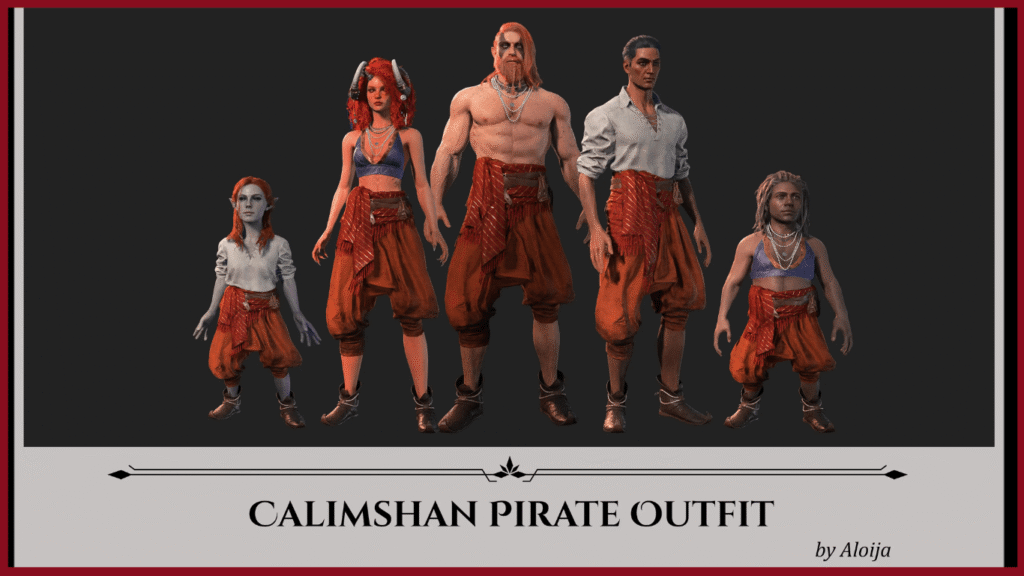
This mod adds a dyeable pirate-themed outfit inspired by Calimshan, and it works across all races and body types. It’s an easy fit for rogues, especially if you’re leaning into pirate, smuggler, or swashbuckler roleplay. Simple and very easy to mix with other armors.
Works with all body types.
Final thoughts…
If there’s one thing rogues get right in Baldur’s Gate 3, it’s that armor is part of the character. A good set tells you who this person is before they ever roll initiative.
Some of these sets ended up glued to my rogue for entire acts, others became permanent upgrades for companions who were never allowed back into their default outfits.
If you’re the kind of player who spends more time in camp rotating characters than moving the main quest forward, you’re in good company. I’ve also put together armor mod picks for barbarians and rangers for when the rest of the party inevitably demands a makeover.
Some classes in Baldur’s Gate 3 value elegance and subtlety. Barbarians just want to look angry and survive the hit. This is part of our ongoing series digging up the best armor mods for every BG3 class, pulled from the in-game mod page, Nexus Mods, and the occasional unhinged Patreon find.
I’ve spent a frankly irresponsible amount of time digging through BG3 armor mods for barbarians, testing what actually fits the class fantasy. These are barbarian armor mods BG3 players can roleplay with, whether you’re running a Conan-style barbarian, leaning into infernal or goblin aesthetics, or going barely armored with fur, chains, and bad intentions.
These are the perfect few armor sets because they look like they have been cobbed together by a… well, barbarian. Most of them are Avernus-themed, and a few are “Gith-like.” They fit any type of barbarian, but they are perfect for your Tiefling or Githyanki.
Now, you young bucks probably don’t know where this is from, while boomers like me are popping our lids just looking at this. This is a recreation of Kurgan armor from the Highlander movie. Just look at it, it’s perfect.
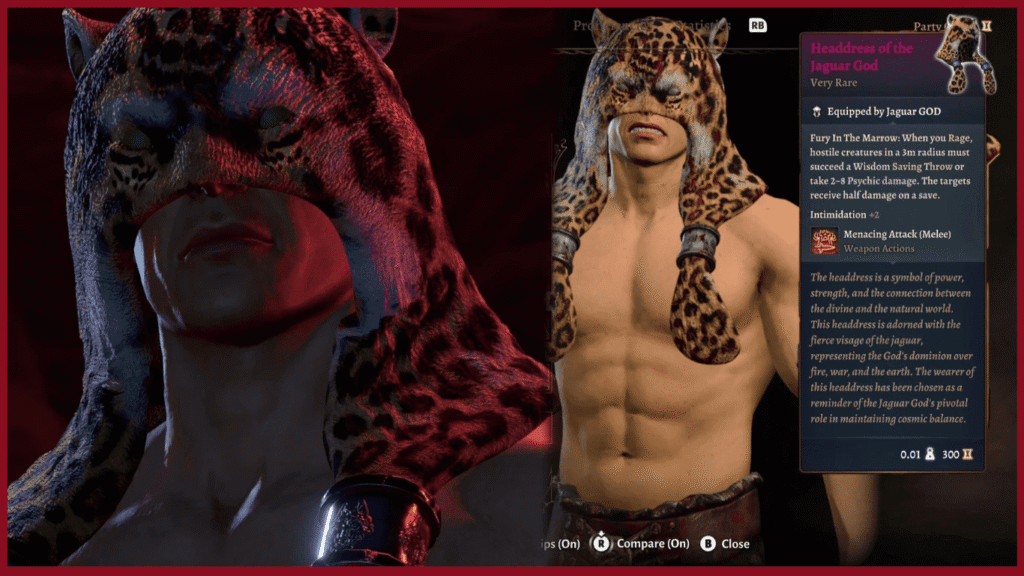
Now this is a simple helmet that looks like you skinned the head of a jaguar and put it on your face, because why the fuck not. You can mix and match this dyeable headpiece with other armors from this list , and it fits perfectly.
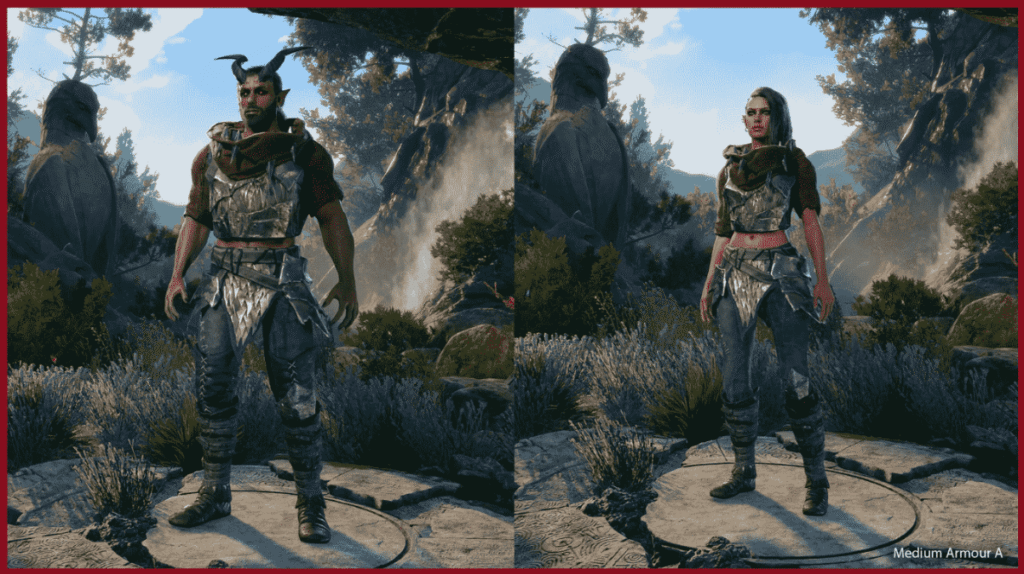
Now, this style works well with Rogues and Rangers, and I’ve mentioned it in the armor mods list for these classes as well, but it fits really well with Barbarians. It’s a dark armor with capes and leather shoulder pads.
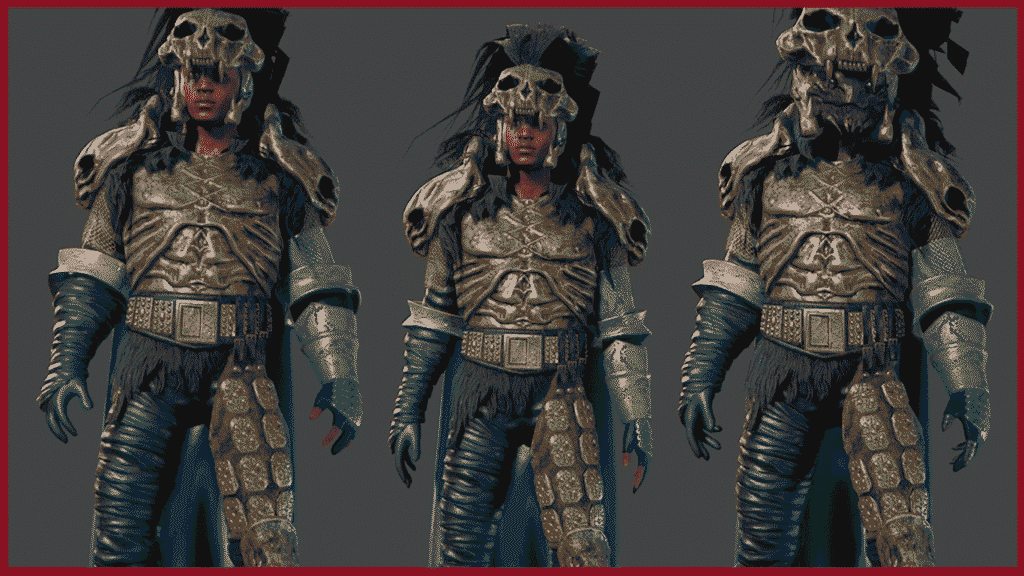
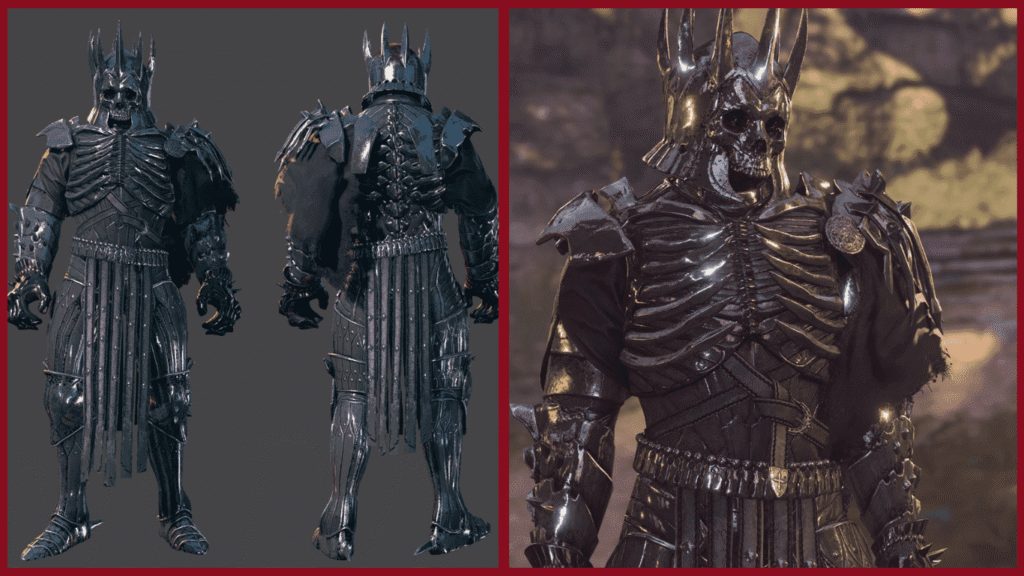
Everyone here knows what Witcher 3 is. I HOPE. Everyone here knows who this armor belongs to as well. YOU’D BETTER. Skull helmet, lots of metal bone parts, Barbarian 10/10.
This cloak is perfect if you are doing a Dark Urge run… Tattered and looking like it’s soaked in blood, and you can easily mix and match it with all the other sets.
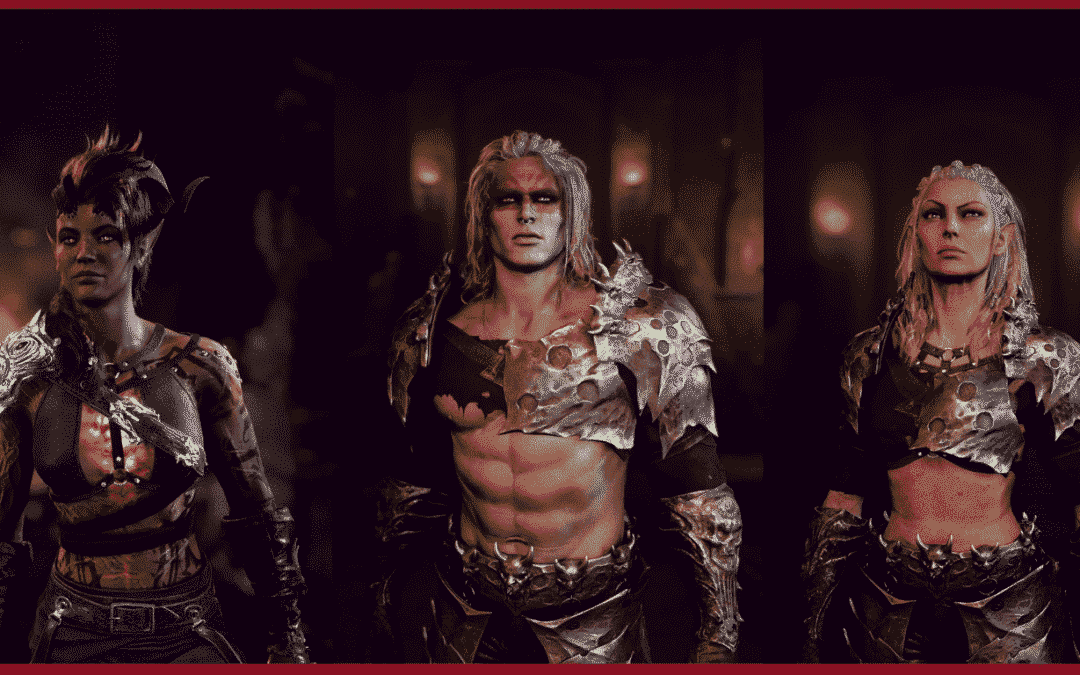
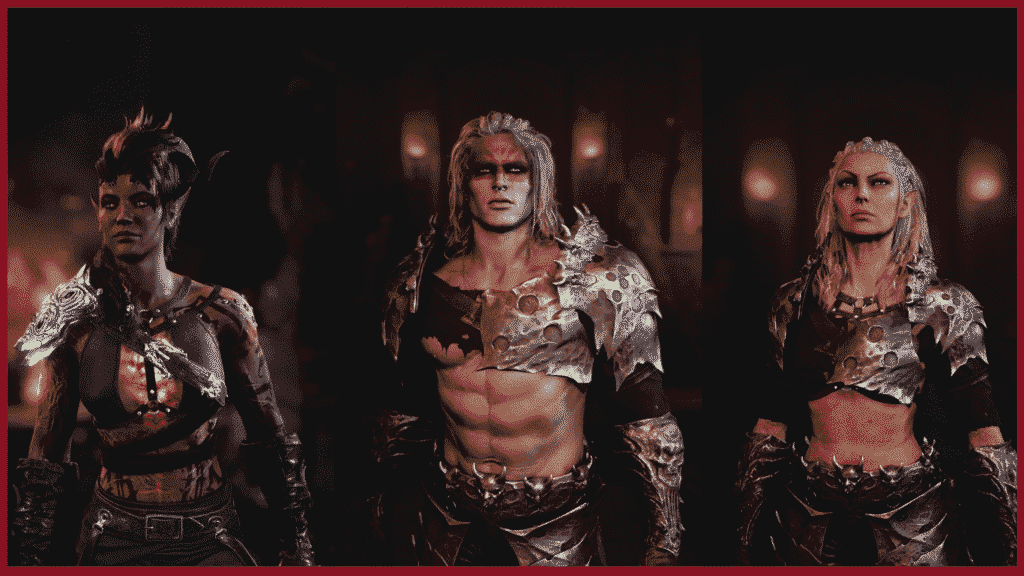
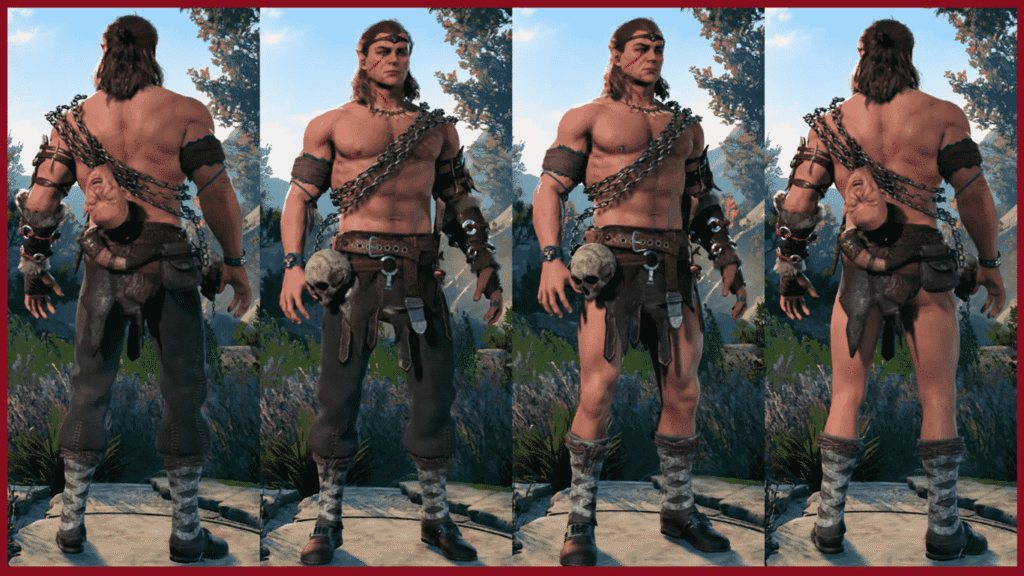
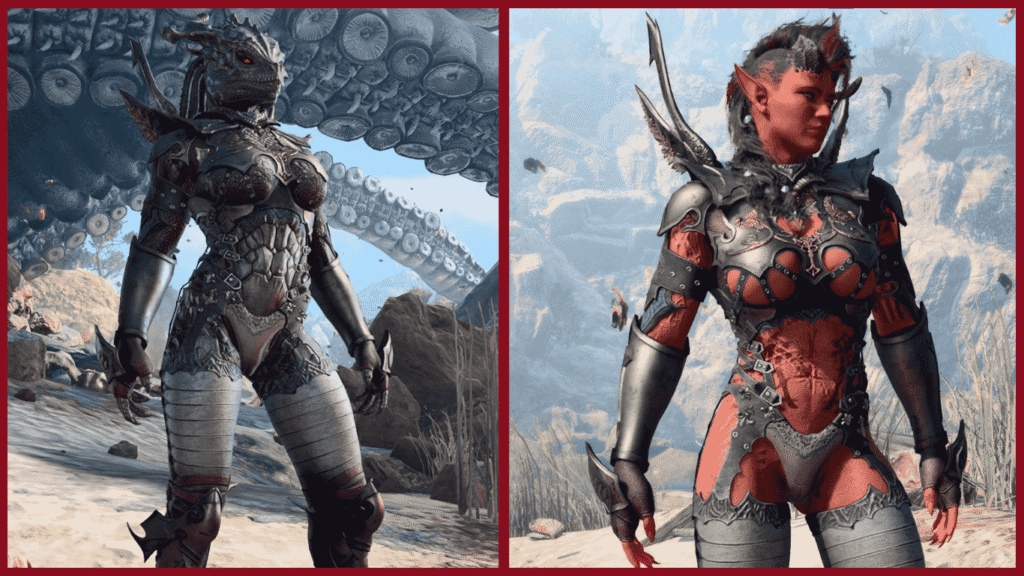
While some armor mods on this list are kinda niche, this is your BARBARIAN, BARBARIAN set. Loin cloth, chains with a severed head on it, a belt with skulls… It’s perfect, and you can finally look like Conan. Disclaimer: Halsin not included with the armor.
If you want to start with cool armor right away on your barbarian, this BG3 armor mod is for you. It’s a set that our favorite demon with a crossbow wears, and the best part is that if you take your panties off, you can run around with a bare ass. Perfect.
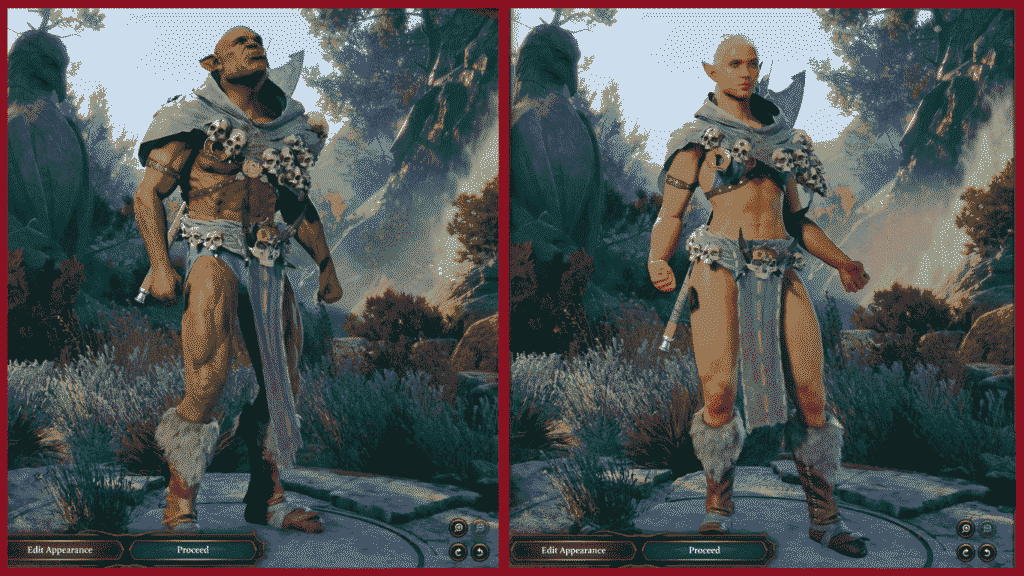
This is a set from Lineage 2, which explains the lack of, well, armor. It looks like it has been made for barbarian Thieflings, looks great on Dragonborn females, or for your favorite hothead Karlach.
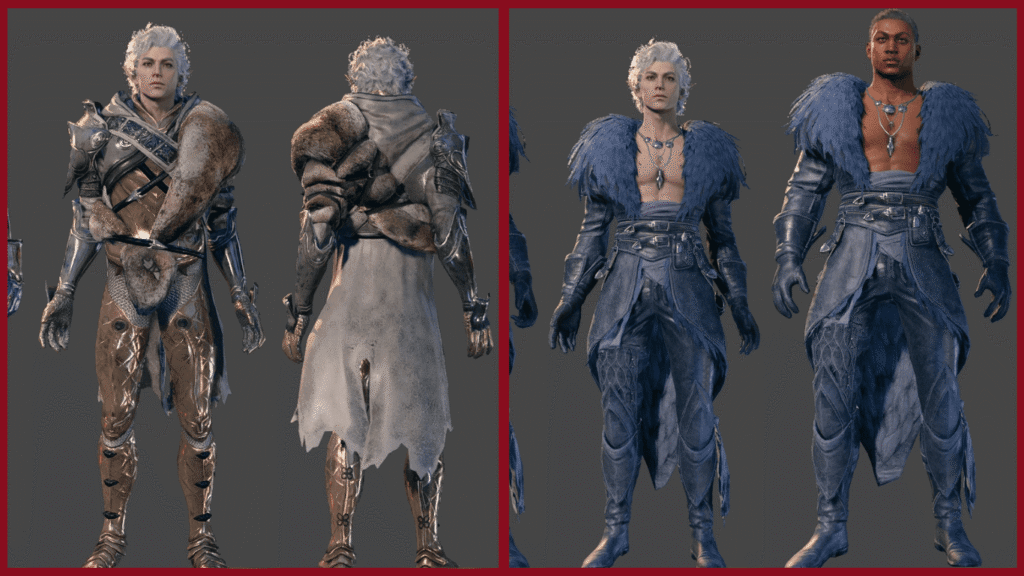
Now this might be a stretch, but I still feel these armors kind of fit barbarians, because of the fur on them. It’s two sets from Dragon Age Veilguard. Trash game, but nice-looking armours.
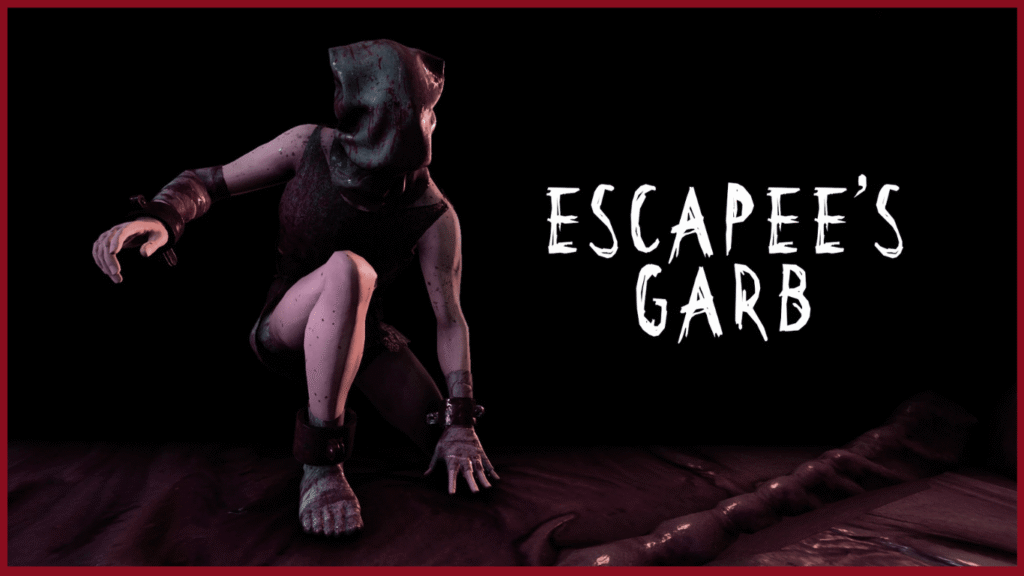
This is another starting set, and it’s perfect for people who want to roleplay a prisoner who got yanked from jail by mind flayers. Also, I think the arm and leg cuffs fit the barbarian theme really well, and you can mix them with other armors.
DISCLAIMER: You can’t use this mod with the Barbarians’ starter armor, as they both replace starting gear unless you use the TUTORIAL CHEST VERSION of this mod.
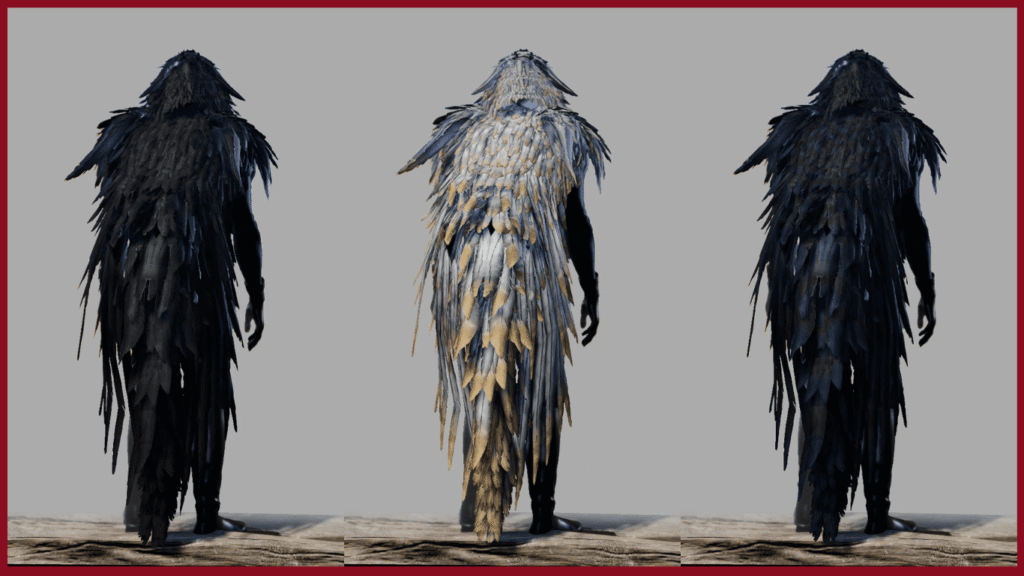
There are a few beautiful cloak options in this mod, and they are all feather or animal-like.
You can role-play ripping them off harpies’ corpses and crafting them yourself after relevant encounters.
Work on all body types.
Final thoughts…
Barbarian armor mods in Baldur’s Gate 3 live or die by one thing: vibe. If it looks brutal, messy, or like it was taken off something you just killed, it probably works.
The sets on this list are the ones I keep coming back to when rolling a barbarian or gearing up a companion for a rage-heavy run. If you’re dressing your whole party instead of just your main character, I’ve also put together armor mod picks for rangers and rogues. Check them out when you have time.
Welcome to my guide on the best Helldivers 2 stratagems. Why would you need such a list, you might ask. Simple: there are 50+ stratagems and only 4 stratagem slots (if you’re lucky) for every mission. So, you have to adapt and choose the right ones to avoid killing your fellow Helldivers and complete as many objectives as possible.
While 100+ hours might not sound like a lot to most of you, for me that’s practically part-time employment! I’m almost level 60 and while I haven’t tried every single stratagem (some sound like an awful time), I have tried to identify the best ones.
Helldivers 2 stratagems tier list
Here’s my TL;DR tier list of the best Helldivers 2 stratagems. Explanations for the choices are provided below. Use this template to share your own tier list and link it in the comments below. I’d love to see what your favorites are.
S-tier stratagems
In my opinion, S-tiers are all-around great stratagems that either one-shot titan-type enemies or lend themselves incredibly well to multiple play styles.
AC-8 Autocannon: S-tier against automatons. Can’t pierce heavy armor.
FLAM-40 Flamethrower: S-tier against terminids. Sucks against automatons.
SH-32 Shield Generator Pack: reliable protection against both enemy types, especially if you don’t like using medium or heavy armor.
Eagle 500kg Bomb: a bit of a personal choice, although it’s probably an A or B tier. The reason for giving it an S-tier, is the huge damage, 2 charges, and very low cooldown.
Orbital Rail Cannon Strike: excellent for quickly taking down larger enemies like Chargers, Hulks, or tanks.
Orbital laser: best offensive stratagem for wiping out automaton bases, swarms, and nests.
A-tier stratagems:
These types of Helldivers 2 stratagems are powerful, or very useful, but may come with drawbacks like limited charges, long cooldowns, or lower effectiveness against certain enemy types, etc.
APW-1 Anti-Materiel Rifle: the best early-game weapon for taking down large enemies. Great for shooting through a heavy bot’s eyes.
ARC-3 Arc Thrower: Infinite ammo, shots chain between mobs, and has the ability to take down heavy enemies in 6-10 shots.
EAT-17 Expendable Anti-tank: excellent anti-heavy armor weapon with super low cooldown. Dosent use a backpack sloth and you get 2 per drop.
GL-21 Grenade Launcher: great for plugging holes, clearing groups, and dealing with bile spewers.
Quasar cannon: the best weapon for taking down automaton ships and blasting big terminid enemies, infinite ammo, doesn’t require a backpack. Wolf stopped me from giving it S-tier 🙂
GR-8 Recoilless Rifle: couldn’t put it down when I unlocked it. Incredibly powerful against large enemies, but reload time is punishing.
A/M-23 EMS Mortar Sentry: a much better option to the orbital/eagle EMS strike. Keeps enemies stunned and in place.
A/M-12 Mortar Sentry: hands-down the most powerful sentry in the game. Doesn’t require line of sight, but will kill your teammates without hesitating.
A/AC-8 Autocannon Sentry: great for short eradicate or defense missions. Good for taking down bigger targets like bile titans.
Eagle airstrike: available right from the start and incredibly versatile.
Eagle cluster bomb: love it because it has 5 recharges and good damage.
Eagle Napalm Airstrike: blows up everything and burns after impact, making it excellent against bugs.
Orbital Airburst Strike: great against bug breaches. Strikes 3 times in a circle.
B-tier stratagems:
These are strong, fun, and overall powerful stratagems that are quite situational, or need a more complicated setup for maximum impact.
AX/LAS-5 “Guard Dog” Rover: S-tier when it’s not shooting you in the head. Only recommended against terminids.
SH-20 Ballistic Shield Backpack: very good against automatons, especially destroyers. Requires a specific setup for maximum impact.
B-1 Supply Pack: useful when playing in four-man parties or paired with machine guns and grenade launchers.
EXO-45 Patriot Exosuit: I strongly recommend this for eradicate, search & destroy, or egg missions (terminids). Not a good choice against automatons.
LIFT-850 Jump Pack: I use it often in my playstyle because it’s fun, and because it gives me higher mobility while fighting bugs.
LAS-98 Laser Cannon: for me, it has lost its purpose since the quasar cannon came out. It also requires you to mostly stay still, which we all know is hard to do in Helldivers.
M-105 Stalwart: the lighter version of the machine gun, with better load time. Combos well with the supply pack.
A/ARC-3 Tesla Tower: incredibly powerful against terminids, but can easily kill allies.
FX-12 Shield Generator Relay: good protection, lends itself well to automaton extermination and personnel rescue missions. Useless against bugs.
Eagle Smoke Strike: excellent for stealth play.
Orbital Smoke Strike: another option for stealth play. Better against Robots because it breaks line of sight.
Orbital Gas Strike: very powerful against terminids. Not good against robots.
Orbital Walking Barrage: similar to the 380mm but throws salvos in front of you. Powerful if positioned correctly.
C-tier stratagems:
C-tier stratagems are a MEH at best for me. I rarely ever use them, simply because there are better options in the game:
MG-43 Machine Gun: Stalwart is a much better choice because it’s faster to aim and move with. Standing still is not really an option in this game.
MG-206 Machine Gun: quite powerful and combos well with the supply back. Doesn’t have a crosshair in third-person.
AX/AR-23 “Guard Dog”: the AX/LAS-5 “Guard Dog” Rover is simply better. This one has less ammo, so it needs to recharge. It’s also more adapt at killing teammates.
RS-422 Railgun: this was one of the best weapons before the nerf. Now it’s a jack of all trades, master of none.
FAF-14 SPEAR Launcher: probably gonna be A- or S-tier when they fix targeting. For now avoid it.
MD-6 Anti-Personnel Minefield: I have a theory that enemies are programmed to avoid these mines as soon as you place them down and your buddies are programmed to step on them.
MD-I4 Incendiary Mines: same as anti-personnel minefield.
A/G-16 Gatling Sentry: better than the machine gun sentry. Not effective against armored enemies. Unreliable and ends up shooting allies chaotically.
A/MLS-4X Rocket Sentry: I like this sentry but it’s very unreliable and usually ends up killing your teammates.
Eagle Strafing Run: Pops intently and has a predictable path. Not that destructive though.
Eagle 110MM Rocket Pods: a decent quick-fire eagle strike available at lower levels. There are more powerful options available later.
Orbital EMS Strike: this is a very underrated stratagem, but the fact that it requires comboing and coordination is the reason I gave it a C-tier. Works like a charm when you pair it with a 500KG. Suitable for hit-and-run tactics.
Orbital Gatling Barrage: the only reason this isn’t a D-tier is because it unlocks at level 2.
D-tier stratagems:
These are the stratagems that I would never choose unless someone pointed a gun at my head because they simply suck.
E/MG-101 HMG Emplacement: yes, it’s powerful & fun, but who’s going to stand still?
A/MG-43 Machine Gun Sentry: objectively the weakest sentry.
Orbital 120mm HE Barrage: just no.
Orbital 380 HE barrage: I’ve never seen someone fire this without killing a teammate. Super slow and hits completely randomly.
Orbital Precision Strike: most unreliable Helldivers 2 stratagem.
Helldivers 2 stratagems codes (cheat sheet)
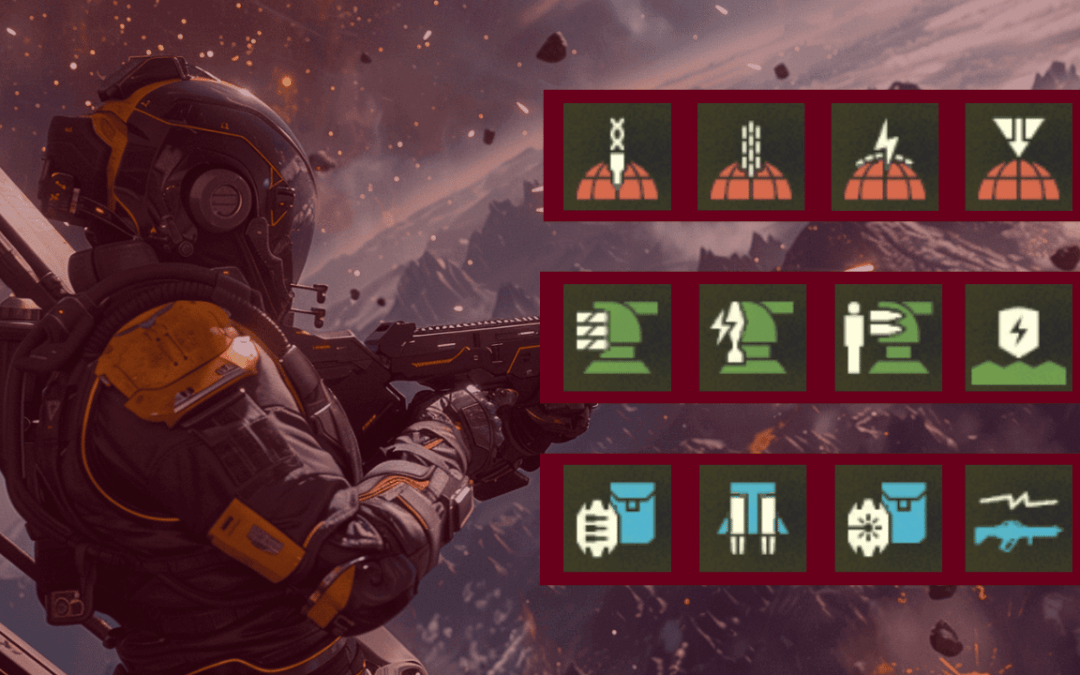
Stratagems are a major part of how you play. They’ll eventually become like second nature. Until then, use this cheat sheet. I’ve organized the codes into four major sections:
Offensive stratagems: enable the use of heavy ordnance, firebombs, and airstrikes.
Defensive stratagems: provide turrets, towers, shields, and mines to defend against enemies.
Supply stratagems: deliver defensive drones, utility packs, ammo, and heavy weapons.
Mission stratagems: become available while you are close to a relevant objective.
Here are the input codes and most important details for all the Helldivers 2 stratagems:
Since mission stratagems are very situational, I’ll just list them in a separate table:
These are all the Helldivers 2 stratagem codes. If new stratagems become available, they will be added to the tables and highlighted for quick access.
Orbital strikes | Offensive
Orbital strikes | Offensive
Orbital strikes | Offensive
Orbital strikes | Offensive
Stratagem
Input code
Cooldown
Uses
Orbital Gatling Barrage
→ ↓ ← ↑ ↑
80s
Unlimited
Orbital Airburst Strike
→ → →
120s
Unlimited
Orbital 120MM HE Barrage
→ → ↓ ← → ↓
240s
Unlimited
Orbital 380MM HE Barrage
→ ↓ ↑ ↑ ← ↓ ↓
240s
Unlimited
Orbital Walking Barrage
→ ↓ → ↓ → ↓
240s
Unlimited
Orbital Laser
→ ↓ ↑ → ↓
240s
3
Orbital Rail Cannon Strike
→ ↑ ↓ ↓ →
300s
Unlimited
Orbital Precision Strike
→ → ↑
210s
Unlimited
Orbital Gas Strike
→ → ↓ →
100s
Unlimited
Orbital EMS Strike
→ → ← ↓
75s
Unlimited
Orbital Smoke Strike
→ → ↓ ↑
75s
Unlimited
Eagle strikes | Offensive
Eagle strikes | Offensive
Eagle strikes | Offensive
Eagle strikes | Offensive
Stratagem
Input code
Cooldown
Uses
Eagle Strafing Run
↑ → →
8s
3
Eagle Airstrike
↑ → ↓ →
8s
2
Eagle Cluster Bomb
↑ → ↓ ↓ →
8s
4
Eagle Napalm Airstrike
↑ → ↓ ↑
8s
2
Eagle Smoke Strike
↑ → ↑ ↓
8s
2
Eagle 110MM Rocket Pods
↑ → ↑ ←
8s
2
Eagle 500kg Bomb
↑ → ↓ ↓ ↓
8s
1
Backpacks | Supply Stratagems
Backpacks | Supply Stratagems
Backpacks | Supply Stratagems
Backpacks | Supply Stratagems
Stratagem
Input code
Cooldown
Uses
LIFT-850 Jump Pack
↓ ↑ ↑ ↓ ↑
480s
Unlimited
B-1 Supply Pack
↓ ← ↓ ↑ ↑ ↓
480s
Unlimited
AX/LAS-5 "Guard Dog" Rover
↓ ↑ ← ↑ → →
480s
Unlimited
SH-20 Ballistic Shield Backpack
↓ ← ↓ ↓ ↑ ←
300s
Unlimited
SH-32 Shield Generator Pack
↓ ↑ ← → ← →
480s
Unlimited
AX/AR-23 "Guard Dog"
↓ ↑ ← ↑ → ↓
300s
Unlimited
Weapons | Supply Stratagems
Weapons | Supply Stratagems
Weapons | Supply Stratagems
Weapons | Supply Stratagems
Stratagem
Input code
Cooldown
Uses
MG-43 Machine Gun
↓ ← ↓ ↑ →
480s
Unlimited
APW-1 Anti-Materiel Rifle
↓ ← → ↑ ↓
480s
Unlimited
M-105 Stalwart
↓ ← ↓ ↑ ↑ ←
480s
Unlimited
EAT-17 Expendable Anti-tank
↓ ↓ ← ↑ →
70s
Unlimited
GR-8 Recoilless Rifle
↓ ← → → ←
480s
Unlimited
FLAM-40 Flamethrower
↓ ← ↑ ↓ ↑
480s
Unlimited
AC-8 Autocannon
↓ ← ↓ ↑ ↑ →
480s
Unlimited
MG-206 Heavy Machine Gun
↓ ← ↓ ↓
480s
Unlimited
RS-422 Railgun
↓ → ← ↓ ↑ ← →
480s
Unlimited
FAF-14 SPEAR Launcher
↓ ↓ ↑ ↓ ↓
480s
Unlimited
GL-21 Grenade Launcher
↓ ← ↑ ← ↓
480s
Unlimited
LAS-98 Laser Cannon
↓ ← ↓ ↑ ←
480s
Unlimited
ARC-3 Arc Thrower
↓ → ↓ ↑ ← ←
480s
Unlimited
LAS-99 Quasar Cannon
↓ ↑ ↑ ← ↓ →
480s
Unlimited
EXO-45 Patriot Exosuit
← ↓ → ↑ ← ↓ ↓
600s
2
Defensive stratagems
Defensive stratagems
Defensive stratagems
Defensive stratagems
Stratagem
Input code
Cooldown
Uses
E/MG-101 HMG Emplacement
↓ ↑ ← → → ←
180s
Unlimited
FX-12 Shield Generator Relay
↓ ↓ ← → ← →
90s
Unlimited
A/ARC-3 Tesla Tower
↓ ↑ → ↑ ← →
150s
Unlimited
MD-6 Anti-Personnel Minefield
↓ ← ↑ →
180s
Unlimited
MD-I4 Incendiary Mines
↓ ← ← ↓
180s
Unlimited
A/MG-43 Machine Gun Sentry
↓ ↑ → → ↑
180s
Unlimited
A/G-16 Gatling Sentry
↓ ↑ → ←
180s
Unlimited
A/M-12 Mortar Sentry
↓ ↑ → → ↓
180s
Unlimited
A/AC-8 Autocannon Sentry
↓ ↑ → ↑ ← ↑
180s
Unlimited
A/MLS-4X Rocket Sentry
↓ ↑ → → ←
180s
Unlimited
A/M-23 EMS Mortar Sentry
↓ ↑ → ↓ →
180s
Unlimited
Mission stratagems
Mission stratagems
Mission stratagems
Stratagem
Input code
Cooldown
Reinforce
↓ ↑ → ← ↑
120s
SOS Beacon
↓ ↑ → ↑
N/A
Resupply
↓ ↓ ↑ →
160s
Hellbomb
↓ ↑ ← ↓ ↑ → ↓ ↑
N/A
SSD Delivery
↓ ↓ ↓ ↑ ↑
N/A
Seismic Probe
↑ ↑ ← → ↓ ↓
N/A
Upload Data
← → ↑ ↑ ↑
N/A
Eagle Rearm
↑ ↑ ← ↑ →
120s
SEAF Artillery
→ ↑ ↑ ↓
N/A
Super Earth Flag
↓ ↑ ↓ ↑
N/A
Wrapping up
Thanks for sticking through this rundown of the best Helldivers 2 stratagems. As with any article of this type, these are my PERSONAL opinions. If you don’t agree with them, feel free to let me know in the comments. Also, I hope you find the stratagems useful. I was using cheat sheets a lot when the game was still buggy and my UI kept disappearing completely.
If you have any feedback or an insanely powerful combo you’d like to share, I’d love to know about it. I love the fact that Helldivers keeps every mission fresh by giving players so many tools for diversifying their game style.
I strongly advise you to try out all the Helldivers stratagems, pair them with different armors and weapons, and tailor your loadout to match every mission scenario.
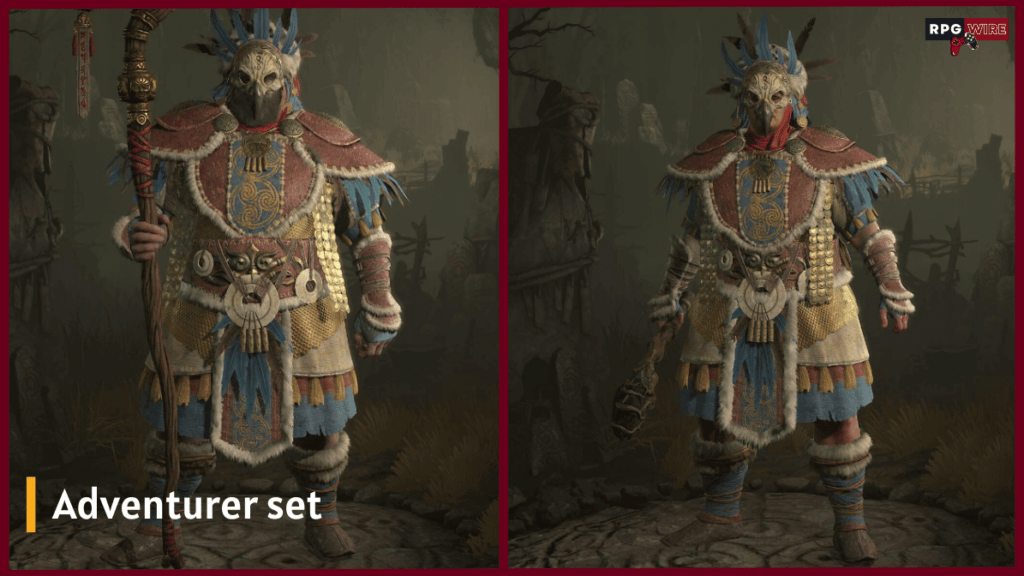
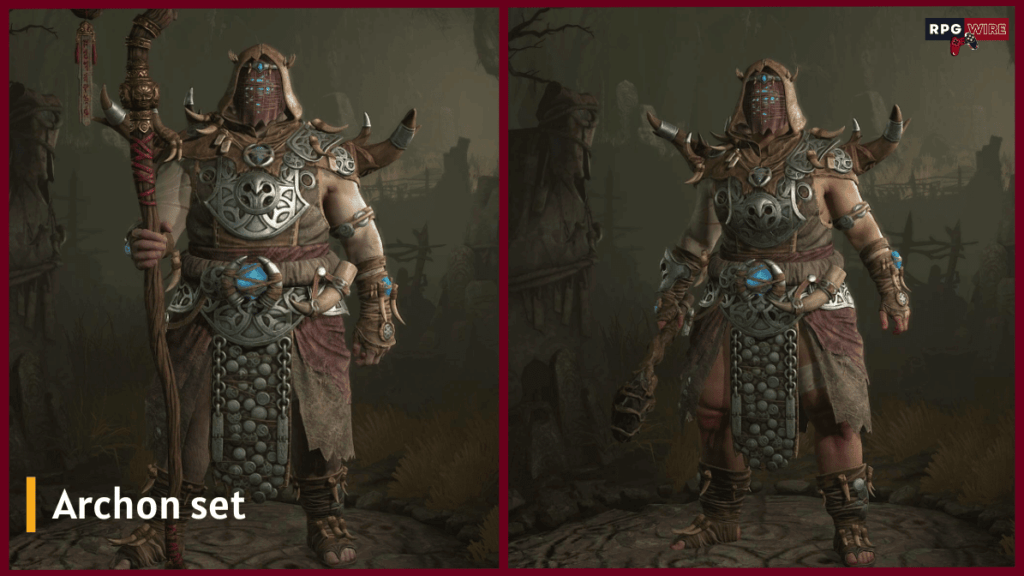
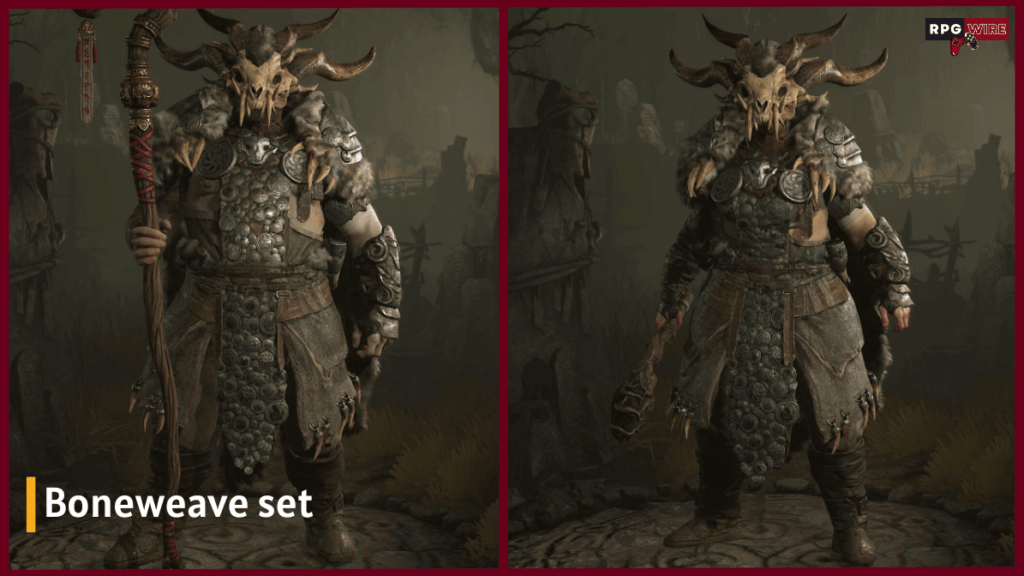
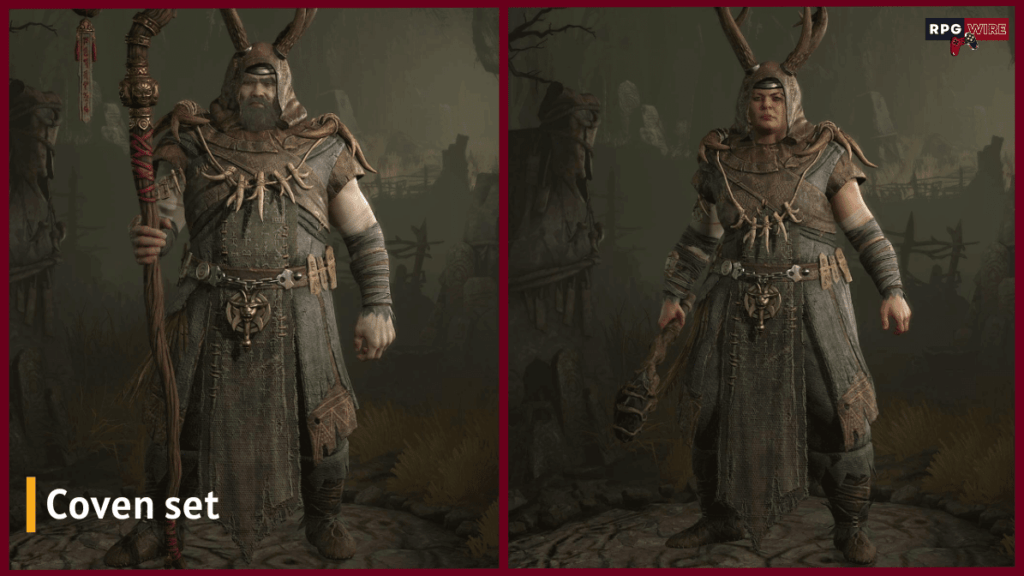
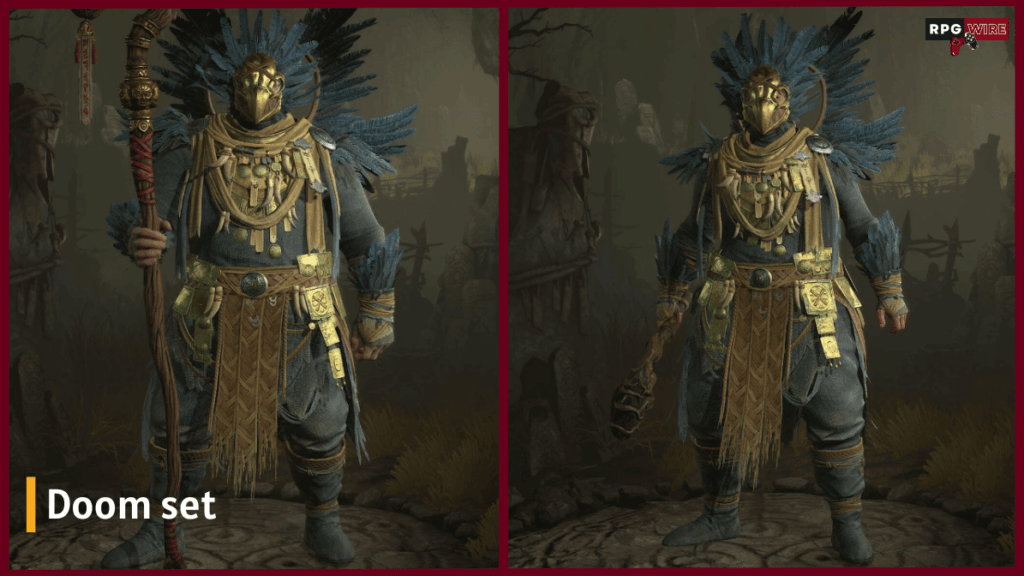
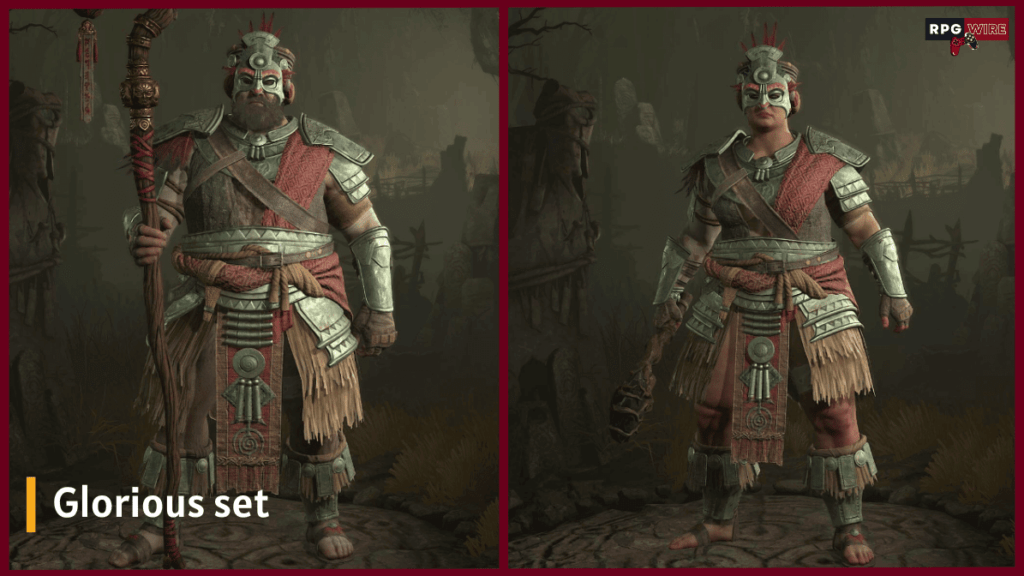
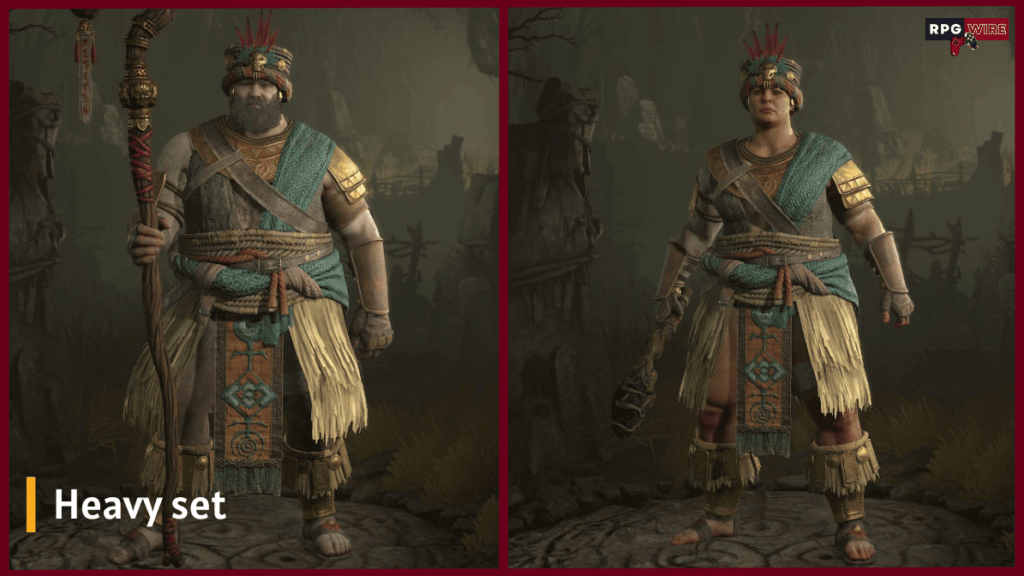
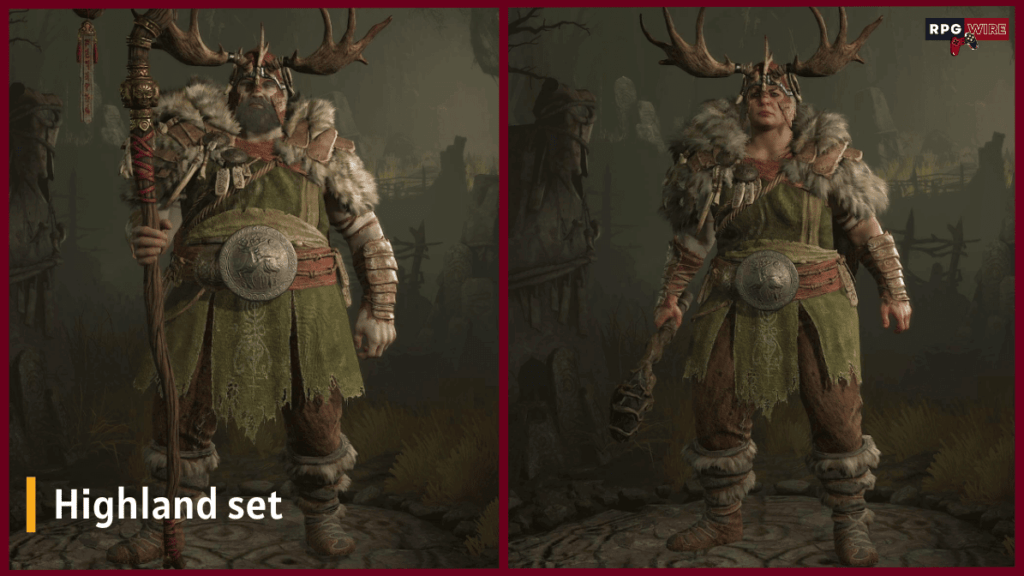
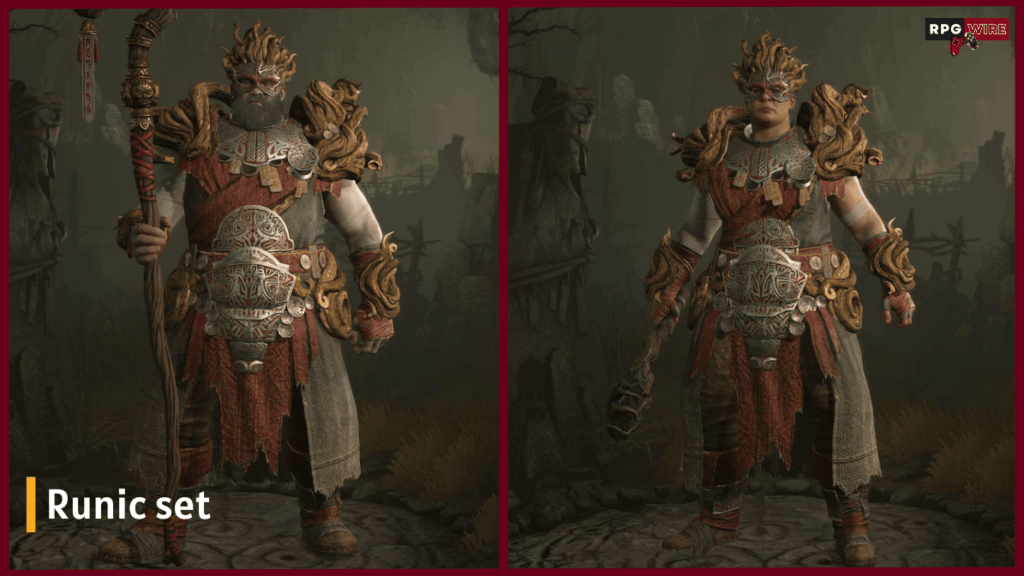
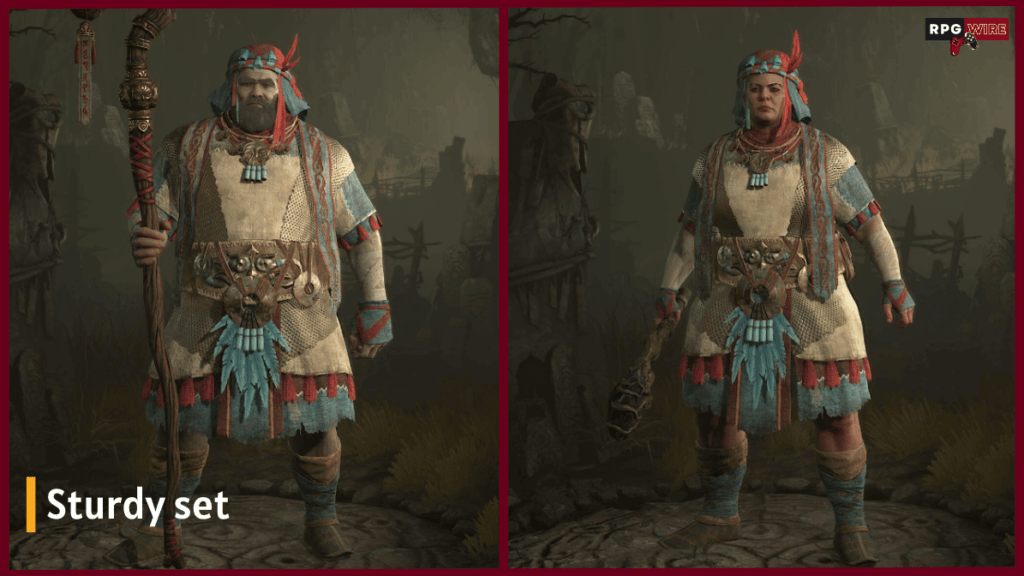
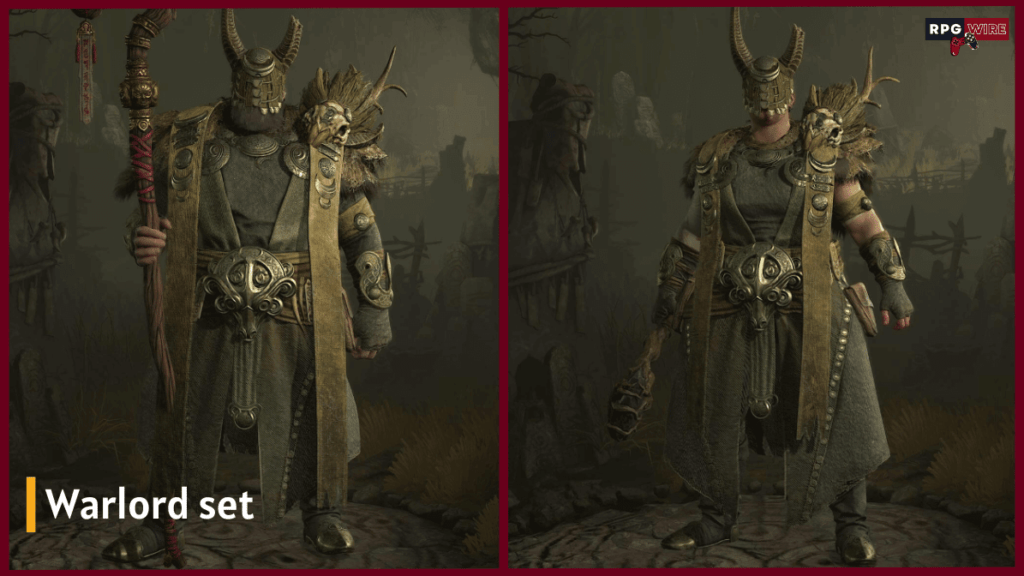
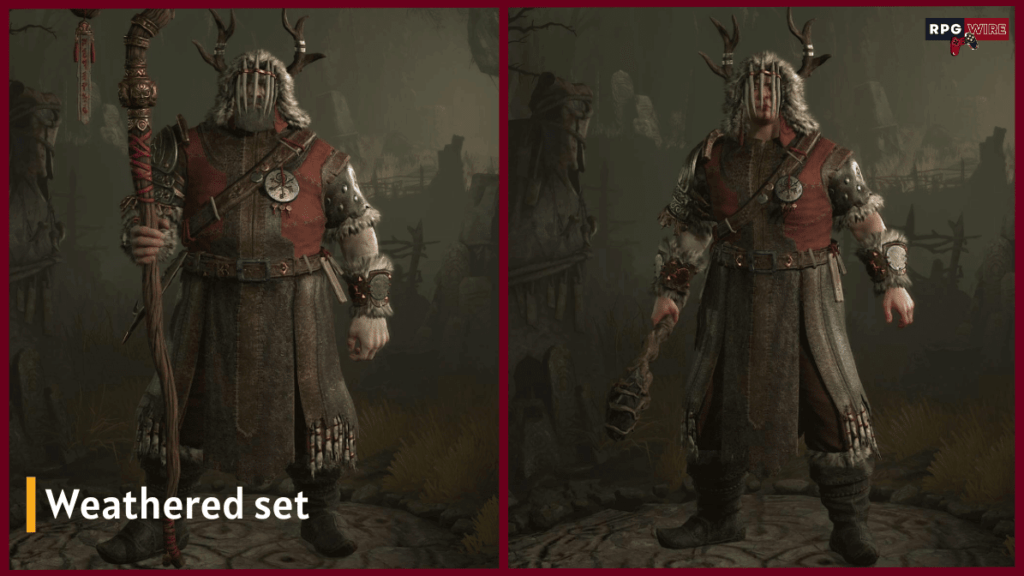
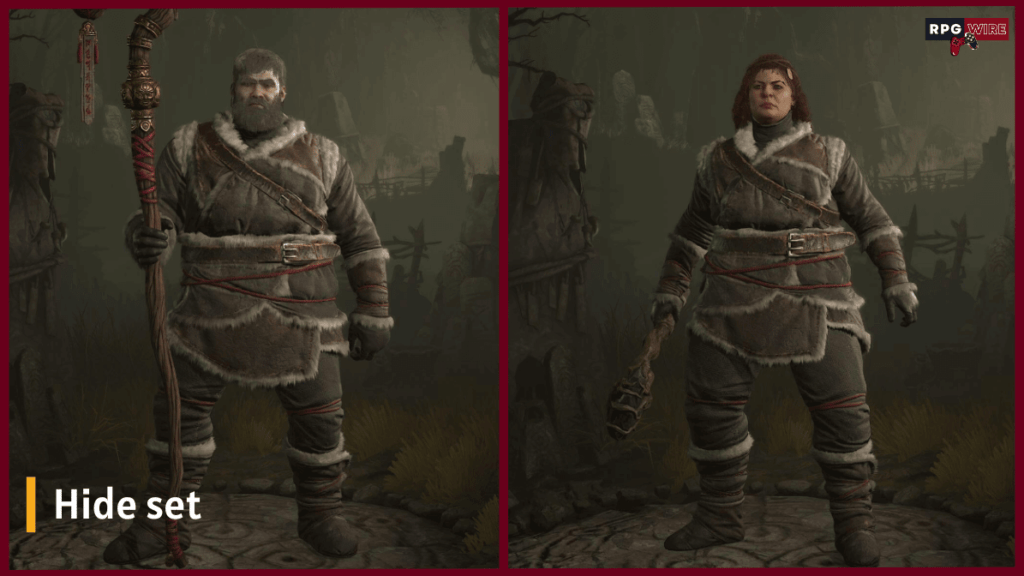
This article showcases all the Diablo 4 Druid armor sets you can find in the world. This is the third article like this I’m typing out. So I have no other good intro. You are not here for my intros anyway, go check these Druid sets out and have a nice day.
Don’t forget to dismantle the random world drops at your local blacksmith to unlock the appearances.
Before you start, a few disclaimers:
There are some armor pieces that are not part of sets, so I won’t include them.
After 200 hours of gameplay we still have 2 Wardrobe slots locked so I’m not sure if those are upcoming rogue armors or they are some sort of legendary drop that is impossible to get. Keep that in mind.
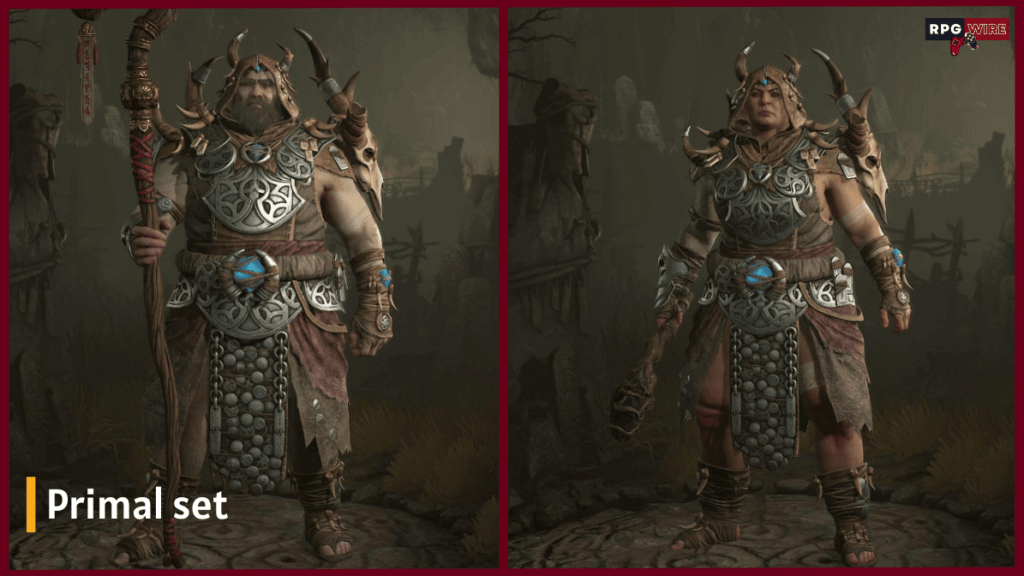
You’re probably noticing a pattern by know. All the classes in Diablo 4 have similar armor sets. What is your favorite Diablo 4 druid armor set? Mine are the Runic and Doom sets. There are still a few locked slots left, so I’m assuming they are planning to release more rare stuff in the future.
I don’t plan on reinstalling Diablo 4 anytime soon, but if anything knew pops up, I’ll definitely be updating this showcase article. Until then, stay safe, and loot hard.


![All Diablo 4 Druid Armor Sets [Outfit Transmogs]](https://rpgwire.com/wp-content/uploads/2024/04/Diablo-4-featured-image-1080x675.png)